Showing posts with label crochet. Show all posts

Thursday, March 10, 2011

Four at a time llama llama legs

French Silk, aka Frenchy.
This first llama was crocheted.
I've managed to pull myself away from omgpop long enough to make some progress on knitting a llama from this crochet pattern.  I started by knitting the first foot and working up the leg, using the cylinder of the leg to measure my knit in the round gauge and comparing that to my crochet gauge.  For comparison I was using the same yarn in a different color and needles and hook with the same mm rating.

Techknitter's disappearing loop cast on was essential as I never had a method for knitting a circle from the inside out before.  That was one of the easy things to do in crochet that I wasn't sure I'd be able to do knitting.  The second obstacle was figuring out how to knit a loop stitch.  Actually, I found a few methods and all of them required me to turn the work when I got to loops rows just like crochet does.  The technique I adopted was to draw a loop over my left index finger and then pull both of the loop strands through the stitch still on my left needle.  (I knit continental.)  Then I move the 2 strand loop from the right needle to the left needle and knit through the back loop the 2 new loops along with the one from the previous row that was still waiting on the left needle.  I saw a method demonstrated on YouTube that uses American/English style, but I really don't want to convert to a method I find clunky and labor intensive.  Not when I can hold the yarn in my left hand as if I was crocheting and have my left hand take up some of the work by pivoting back and forth.  Seems there are a few variations which instruct one to alternate loop stitches rather than loop rows. I'm finding that loop and regular knit rows alternated seems to produce a greater row height than plain knit rows alone.  Since I have many rows to alternate I'm just going to keep going and when I've knit more than an inch high I'll measure it and decide how to adjust the number of rows to knit.

I've completed one row with all four legs together, after knitting three legs at a time up to that point to catch them up to the first leg I started.  I also took apart the first leg and added a few rows to it.  I'd knit a single row of Miski Snowflake and left a really long tail of rust in the first leg specifically to give me the easiest method for adjusting the first leg if I needed to later.  Using the row of snowflake as if it was waste yarn in the method Cat Bordhi defines for creating tentacles on her Jester Tentacles Bag (Ravelry link) in her book A Second Treasury of Magical Knitting I just turned the first leg inside out and freed the low end of rust. I caught loops from both the rust and snowflake yarn on dpns while unraveling one row from the loosened end.  Then I split spliced (a.k.a. spit spliced) a ball of snowflake onto the loose end.  I knit more rows in snowflake since I had variable amounts of that color on the feet of all the other legs and all of them were much more than a single row.  Besides the first leg initially having significantly less snowflake color, I decided to add on a few more rows of knitting to the height of the leg, but had already completed two rounds of loop knitting at the top of the leg.  Adding height with the snowflake color at the foot/leg junction was the ideal solution.  Somehow I managed to add the first leg while having the foot point the opposite direction.  Since the legs have no shaping, this shouldn't matter.

What makes knitting so completely superior to crochet?
The ability to work multiple items at the same time on the same needles is the best reason I can give.  I'd started each of the feet individually and then worked them up to equal points and put them all on two circular needles.  The same method that Cat Bordhi introduces in Socks Soar on Circular Needles can be used to knit a single cylindrical type item in the round, but you also can continue to add extra work (I only do copies of the same item and line them up in the same place to avoid confusion) as long as you have a free end of yarn to knit with.

For socks, I wind up about half a hank of yarn into a center pull ball, then take if off the ball winder and set it into the middle of the box of my Tilta Swift.  I'll take the remainder of the hank off, turn it inside out so the inside end is on the outside, then using that end wind up a second center pull ball leaving the yarn that connects the two uncut.  I usually drop these siamese twins into a small yarn sack and work from each end at the same time.  It can be a bit funky casting on for two at a time.  I really can't explain just how I do it myself even.  Sometimes are clunkier than others. But with this method I can be assured that my socks really are twins.  There are times (might not happen now) when I've had to make a decision about something and not been certain of exactly how I interpreted an instruction or improvised to be able to do the same thing again in a second sock.  Finally, I really don't have the correct personality for doing the same thing two or four different times if I can make two or four versions at the same time.  The only trick then, and you learn it fairly fast, is to make sure you are using the correct yarn end for each sock or item.  Each one needs it's own end of yarn.  This is a trick I use when I'm not sure I'm going to have enough yarn, like in the llama feet, but I want to use up as much as I can of the first color or want to be certain that the second color will start in exactly the same place on multiple items.  (The llama legs don't start with a different color in the same place because I decided synchronized color changes was not a requirement for this project.)

With socks you will need to work one heel at a time at the part of the pattern where your rounds turn into rows.  It's such a short amount of the whole that even I can manage it.  The only other difficulty is when you are working patterns with decreases.  The order for your work is to knit side A of sock 1 then side A of sock 2 then side B of sock 2 and side B of sock 1.  You may find that you need to k2tog with one stitch on one circular needle and one on the other AND there is no way to reach it yet.  If it's on the right end in the right direction (will usually be the second sock or the one that's on your left at the start of each new round) you just slip the stitch from one needle to the other.  But if it's the last stitch on the first needle for the first sock you won't get to the second k2tog stitch until you've completed the second half of the second sock.  But this is easy to work around by slipping the first k2tog stitch off onto a removable marker or suitable safety pin and then sliding the marker onto the second needle where the second stitch for the k2tog lives.

Currently I am using 3 balls of yarn to knit the four legs.  This is also where my Fiberspheres are shining. I am using the outside end and inside end of one ball at the same time in the large Fibersphere.  And two small Fiberspheres are unfolded and then snapped together (like a figure 8) to hold each of the other two balls separately.  I'm hoping for no big tangling problems and haven't had any so far.  I'm trying to be very consistent about turning my work first one way and then the other (clockwise/counterclockwise) so that I'm not winding up the yarn strands for each half round.  I'm winding and then immediately unwinding by turning in the opposite direction.  (In retrospect, I found that the single ball of yarn strands twisted anyway, but with no tension on them they didn't actually tangle.  I could easily push back the strand I wasn't using even though it spiraled around the other strand.)

I realize this would be better with more pictures to tell the story, but really, I'm not feeling up to illustrating all of it with examples.  And there's probably information about this in other places that truly are more like resources anyway.  I always look to Techknitter first when I have any question or challenge.  She is amazing.  Maybe later I'll mention how I kitchener stitched the first leg back together using her knitting needle (not tapestry needle) method.  Or I'll just link it now because I'm feeling lazy - no efficient.  Efficiency rules.

Thursday, January 20, 2011

Knit a llama llama, a drama llama

I've started a knit version of Coquena the llama and am using llama yarn, of course, progress toward an eventual fiber menagerie.  I measured my crochet gauge, which was 7 stitches and 7 rows to the inch. Then I knit the foot after finding TechKnitter's Disappearing loop method of casting on in the middle.  It is an excellent method. To avoid the time and effort knitting a gauge piece for gauge's sake and knitting it in the round I just planned to measure the gauge in the column of the lower leg. Turns out that using the same mm needle as the size crochet hook I'd used (and same yarn, but different color) also yielded 7 sts to the inch, but 9 rows to the inch instead of 7. To compensate for this I added 2 rows for each 7 rows which made the row count for the lower leg 22 instead of 17. (14 + 2 + 2 + 3 + 1; 2 for each block of 7 rows, 3 rows to finish off the original 17 in the pattern, plus one additional row because 3 is nearly half of 7 and I add 2 with every 7. I'm sure I have not accounted for that in a very clear way, but that's all that comes to mind in way of explanation at this time.)

Poor Frenchy, assembling her for a pic I see one arm
is incomplete and the other not stuffed!
Didn't notice this llama already named French Silk before I named my crocheted version. I based her color pattern on this llama with a painted coat. And then when the yarn arrived the combination reminded me of the chocolate pie with that name.

Unless I change my mind I'm planning to pattern the colors on the knit llama mostly after one called Macarena. She and a few others I saw in photos have very dramatic white faces with black eye patches and rust colored bodies. It's a very dramatic look I just have to attempt.

Poor French Silk, my unfinished crocheted llama llama.  She's in pieces. All Nearly all of her pieces are completed, but sewing together is often a place where I cast on something new instead.


Drama llama's leg is definitely coming out smaller so far.
I'm really excited about knitting a llama llama. I'd much rather knit anyway, and crochet, especially crocheting stuffed toy tight, is very hard on my hands. Also, whenever there are duplicate pieces to work I knit them simultaneously using a pair of circular needles. I cannot crochet two pieces of anything at the same time. It worries me that the duplicates might not match exactly and it just seems slower to do them one at a time.  Since this is a stuffed animal and not a garment I am very hopeful that the knit version will be simple to engineer and will very closely resemble the crochet original, only smaller, probably. I am a little concerned about the way that single crochet produces a much denser fabric than knitting. I don't think I'll be able to stuff a knit version nearly so tightly as a crocheted one.

Crossing my fingers! Well, figuratively crossing them; they're actually busy knitting or typing about the knitting.  Honestly, I kind of like the white ring around the ankle on the knit leg. What I was doing was putting in two knit rows with "waste yarn" to make it easy to remove the unaltered foot (without extra rows to compensate for the comparative shortness of knit stitches) and replace it with one reworked to a taller proportion. I'm kind of leaning toward not only leaving the white ring, but making all the other feet to match this one. It's a decision I'm going to postpone for a bit. I have not yet mastered or even attempted a knitted loop stitch. There's a pattern for it in a book I have. Besides that, the only other concern I had about knit construction was with starting in the middle of a tight circle. Presto! TechKnitter's disappearing loop method pops up. Thanks so much TK!

Sunday, January 9, 2011

Llama llama in progress

I've completed maybe half the work on my Coquena the Llama llama project having bought llama yarn in two colors and then buying more from additional online retailers after running out. Actually they all tended to have little stock in the colors I wanted.

Now they have nearly all arrived (except for a single hank of Mirasol Miski in Snowdrop #100 that Webs owes me). Miraculously, they all have matching dye lots across all sources - so far anyway.

Referring to the last image: the white starts after I used an entire skein of brown (Mississippi), coffee mug is just for size reference.  And the images show a much earlier than current stage of completion.

I'm calling my first llama llama French Silk since the yarn used (Mirasol Miski in Mississippi and Snowdrop and Elsebeth Lavold Baby Llama in Dark Brown) remind me of the chocolate on chocolate pie with the same name.

Ran into a bit of a snag missing or forgetting part of the instructions to make my coat loop stitches about 2" long.  Noticed it by the time I'd gotten to the tops of the legs where the directive is repeated to make 2" long stitches and emailed Paola to find out why the loops on the tops of the legs where 2".  She very kindly explained that they should be the same length as on the body and that the body instructions call for the same size loop.  I'm so glad I asked!  I'm going to redo the top of the one leg that had loops so far and make them match the loop size I used on the body.  French Silk has been more recently sheared than Coquena, that's all.

Was going to hold off posting until I got a few better pics representing current state of progress.  But that's going to make an even BIGGER, more tiring post by the time I'd get around to finishing it, so I've changed my mind (well, obviously!).


This would make more sense if I hadn't deleted references to struggling with trying to match the eye highlights and reworking over and over.  On my next try, which could be the 7th or 11th I'm going to use a single strand, although the right one I'm trying to match was done in a double strand.  Seems that with a single strand and maybe twice as many passes I'll have more control over how it turns out.  You can see what I mean about the longer leg loops anyway.


Thursday, December 23, 2010

So Excited - and Relieved!


One of the items in the box; a hotpad/trivet from this pattern
I am thrilled to be home from mailing a box of gifts to my Aunt Marge. I felt really low for missing the Priority mail deadline and feared just how much it was going to cost me to send her box Express mail. Even worse, the Clauses are more than 12" high. I don't think they are quite 14" tall... more like 13" or 13.5 or so. The postal service adds a surcharge if your package goes over 12" in any direction...or at least they do for priority mail. The woman at the main post office didn't overtly measure my box or draw my attention to that. But her scale is probably marked with a ruler along the long and close side, just like the scales at the diy kiosks. The box I was using was stamped 12 x 16 x 6 on the bottom, I think.

The box I was reusing came from Delight.com and contained items I'd ordered earlier in the week. I'd bought a few containers from them including a water bottle that folds flat and rolls up and 3 different silicone containers: flat, folding coin purse, eyeglass case, and a mini case. So apparently I didn't buy the eyeglass case, but a nearly identically sized one that's arranged portrait-wise. What really impressed me about my order was the way everything was packaged.  My items were pretty much submerged in the degradable (cornstarch based?) "ghost poo" that they use for package filler. (The filler pellets aren't styrofoam, and they dissolve in water.) It was quite an experience to have to stick my hands into the box full of puffy pellets and grope around to find the items. There was pink tissue paper layered under the pellets and lying on top of them so I had to move the tissue aside to get to the pellets. I really should have taken pictures!

I would have liked to have recreated this experience in the package I was sending my aunt, except the items I was mailing took up far greater volume in the box than the items sent in my delight.com order. The biggest items were the Clauses. Still, I re-used what of the ghost poo pellets would fit.


You can briefly see the holly leaf and berries that decorate her bun when her hat is off. I didn't realize part of the green from that was visible beneath her hat until after I'd taken the photos, uploaded them to my computer, packed the box and driven 40 minutes each way to ship it and returned home, and then browsed them in preparation for putting the photos here. oh well!

Besides the handcrafted items, I included a Hallmark ornament- a puppy whose coloring resembles Chloe's, a kit for making a pawprint keepsake item, and doggie cookies for Chloe.

Eeek! Can't believe it's taken me this long to link to the pattern for Mr. and Mrs. Claus - what a goof!

Santa Baby

Finally Santa is finished and all his pieces are assembled. But first a recap:


This is the way I got his hair to fit. 


Here he is in pieces:


And waiting to get all the ends woven in, snugged tight and snipped:


Here comes Santa Claus, finished and with Mrs. Claus - up next!

Monday, December 20, 2010

Hurray for miracles!

For reasons I can't identify my sister's old camera suddenly loves me. No more oddness, all is predictable and easy. Yippeeee!!


Now, just imagine you're listening to "Isn't she lovely?" (or be a sport and hum it) and ignore the stray threads that need to be secured and clipped. If she continues to behave herself and cooperate I won't display the photos of her modeling the long underwear and clunky black boots that are under her gown.


Mrs. Claus certainly has turned out well so far.

Tuesday, December 14, 2010

Holding hands

But not feeding ducks (ha ha!)

Actually I'm making the Mr. and Mrs. Claus hands and really enjoying it. They're surprisingly simple to make and one of the details that drew me to the pattern. I haven't managed yet to take a photo that captures the image I'd like, but the ones that came out in focus I'll share.


I ran out of yarn, using up all of the Bernat Satin Sport in Wine. I went out looking for it, knowing that when I bought it at Michael's it was the only skein they had. I was looking for sport or dk weight and still this was the only choice in the red range. It's been a nice choice, except that initially the skein had kind of a worn and manhandled look to it. If there had been any other available I would have bought that instead.
So I went to JoAnn's first, thinking that specifically the satin sport had been advertised in a recent flyer. Don't know for sure if it was or not, but all I could find was Bernat Satin in worsted. (I may never forgive them for rearranging the store in July!) Bordeaux appeared to be the exact same color was Satin sport Wine.

I went back to Michael's, where they scanned my yarn wrap and told me they should have had 1, then the clerk corrected herself and said 21. She called someone to help me look and I was a bit surprised where she looked for the overstock before declaring that they must have sold all of them today. I still think that sounds a bit far-fetched. Although it is a nice seasonal color. She went on to tell me that they get shipments on Tuesday and it might take a few days to get all the stock on the shelves, check back.

I figured I'd switch to the new yarn for pieces not yet crocheted. I even did an experiment with removing a single ply from the worsted yarn and crocheting the second of two identical parts in the modified yarn. The first had been done in unaltered worsted. I wanted to see whether it made a size difference (using the same hook for both). Removing a ply did seem to make the altered yarn about the same thickness as sport and I got the same wpi from it as well. Comparing the two finished items side by side (no photo to share yet as they all came out blurry) the size seemed the same. The difference was thickness - thicker yarn, thicker piece. It also made it feel a lot less pliable.

I think the full thickness of the worsted yarn is wholly appropriate to use in Mrs. Claus's dress. When I began the red portion of the dress in sport weight it seemed a bit airy to me. Actually that's the folded up bottom portion of the dress directly behind the hand on the right shown above. It's at about row 15 or so of 23. Oh - I did get a photo of that separately. I am enjoying the way the characters and their clothing are assembled. I suppose that may sound like a strange thing to say. Perhaps the construction is very standard for crocheting doll like figures. I can't recall whether I've ever crocheted similarly shaped and divided up items before. I guess there may be similarities to the knit Jack Frost I have yet to complete. He's on hold until I finish the things that need to ship out and arrive in time for Christmas.

I'm starting to get concerned that I may run out of the yarn in worsted weight as well. I understand what someone else told me yesterday that her patterns don't give yardage - well international wouldn't be yardage - meters that is, because she can't know what hook you used and what weight yarn. I still think it's kind of troubling to expect someone to guess. If it's going to take more than a skein or more than two skeins of yarn perhaps that really is something that should be known up front. Of course how is the designer to know what skeins I'm using, the meters are all different. I say do what everyone else does and write the pattern with amounts and names of yarn used and hooks or needles used. At least that gives everyone else a basis for comparison that you don't have when the pattern simply tells you to get the colors: red, white, fluffy white, black, dark gray, etc. I guess I should have been able to tell that so very much red would be required, but my skills just aren't there yet.

Tuesday, December 7, 2010

Seasonal Clauses

That would be Santa Claus and Mrs. Claus, of course.

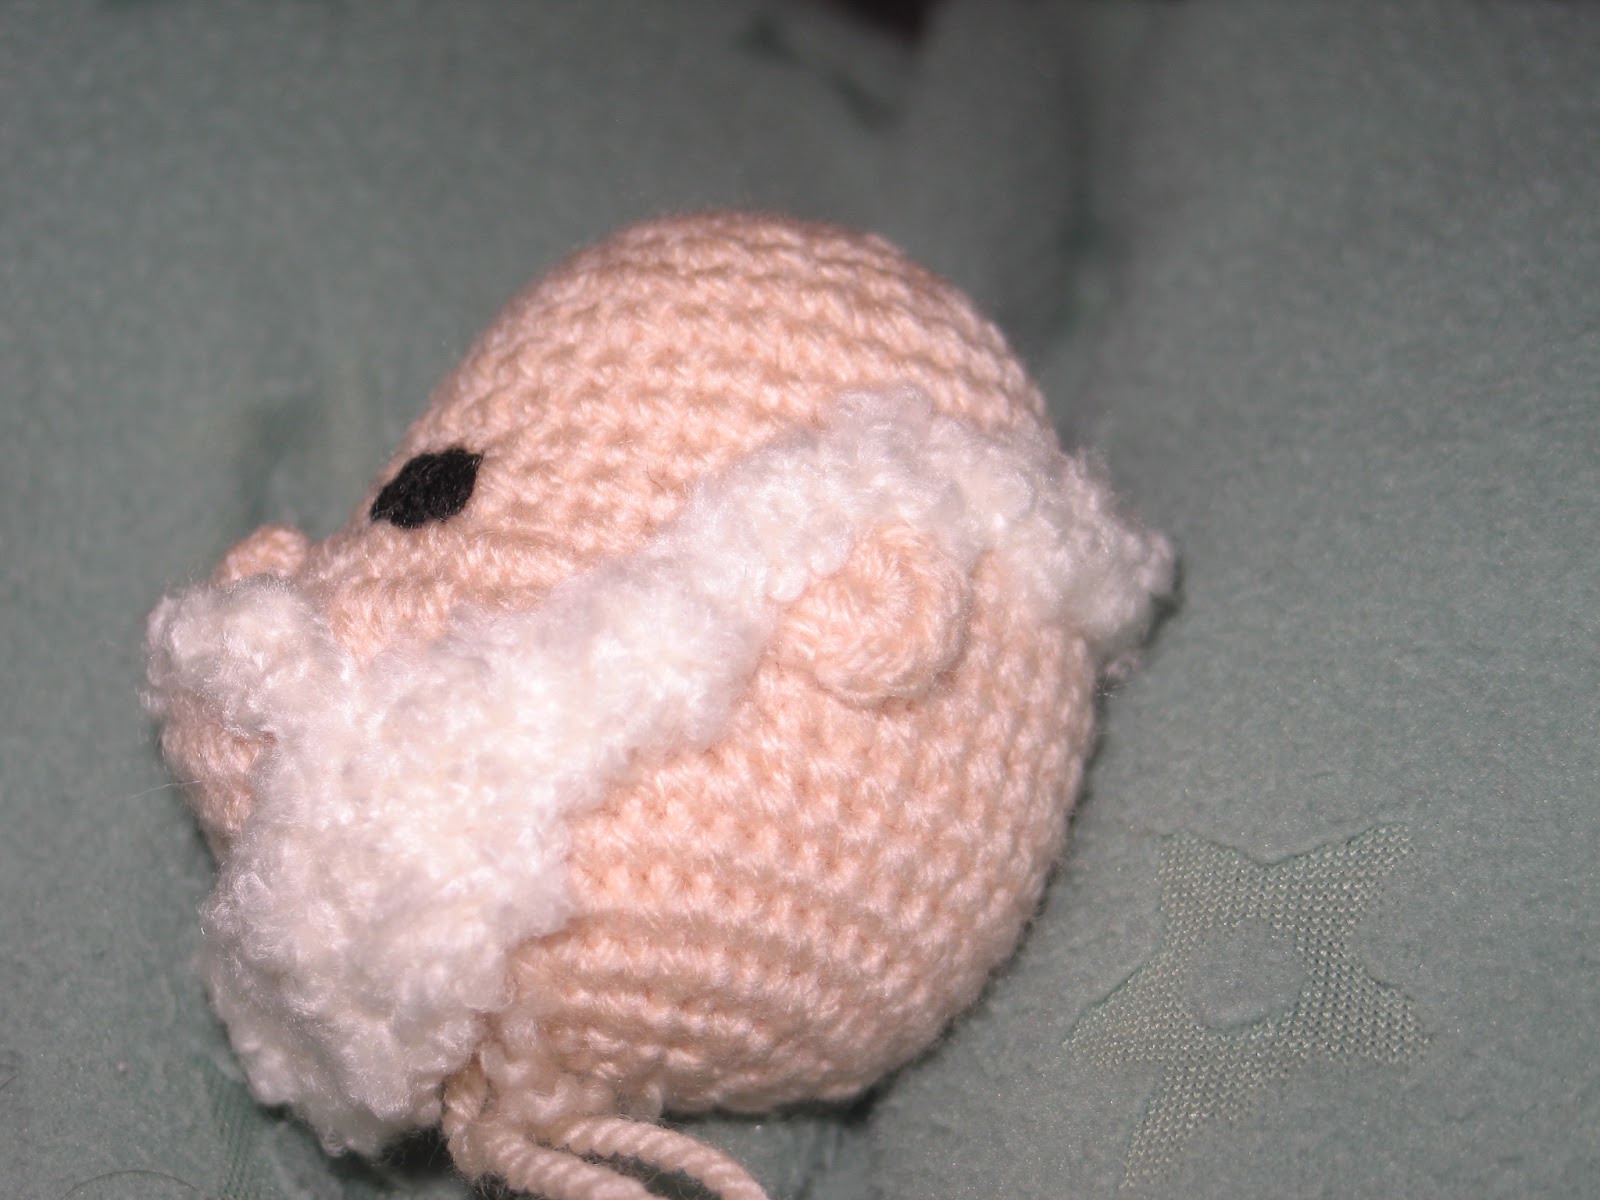
I appreciate that the pattern gives her dimensional bangs. The first time I made her hair it was a bright white. The when I got to Santa's hair and beard, it called for furry yarn. What I could easily put my hands on was slightly off white. I didn't think about that making a difference until I had them side by side the next day and her hair made his look dingy. Actually, the pattern calls for making her hair gray. At first I couldn't find my dk grays. And then even after I did I just wasn't so keen on giving her gray hair. So I looked through the dk yarn again and found this off white color that didn't clash so badly with Santa's hair.

I did have a hard time figuring out how to apply Santa's hair and just how his mustache was to be completed, but managed something.

I think what is shown here is partly due to shifted position or the angle of the camera. I have her hair pinned on with a single U shaped blocking pin in the front. When I first made her hair in blinding white the back of the hair seemed impossibly short. Here you can see it sort of tapers down to about ear lobe level, which is realistic. In the original hair I added several extra rows to make her hair extend down as far as i thought it should be. In the second hair (pictured) it may just need a slight adjustment in positioning. I've left the yarn uncut, though, because I haven't completely made up my mind about whether or not the hair is finished.
I


Here's Mrs. Claus's hat, which seemed awfully slow to work, but it was easy and very clever for generating all those ruffles.

Together again. I realized typing just a bit ago that I didn't have any snapshots of Santa's hat yet. It's only partly completed, but starts from the round white ball at the bottom tip. This pattern is easy to follow with the increases and decreases and it clearly pays very special attention to construction and shaping. For instance, the ball which anyone else would have made a pompom - it's crocheted!


When I finish up the clothes for this pair it's going to be no more crochet with boucle for me!

Friday, December 3, 2010

An Idea, unexpected inspiration

Yesterday I was at Walgreens for just a sec and I saw a young woman wearing a scarf wrapped once around her neck with the long side extending down one leg about to her knee. I live in central Florida; it was still fifty some degrees outside at the time. It was the second day of dramatically colder overnight temperatures, though. I don't usually see such elaborate scarves being worn here in any weather, really. Hers appeared to have a pattern with small squares with little stripes that mimicked a basket weave.

Driving home I had a thought that the Diagonal Box stitch pattern by SmoothFox could make a really interesting scarf. (Technically the pattern is written to make just one quarter of the square to the left, as if starting from any of the corners. I was just determined to make a 12" square in one piece and arrange the diagonal stripes just so.)

I think if making something long like a scarf I'd start off like a small square, maybe just 6", and instead of reducing the number of squares in a row to make a square overall it seems like you could just keep going back and forth along the diagonal with the same maximum number of blocks just as long as you like. I suppose it would actually be reducing by a square on one side and adding one on the other, but still keeping the same number of blocks each time until you get to where the end should be.

The downside to a scarf would/could be that it makes a slightly, but noticeably stiff sort of fabric.  But I have a feeling in softer yarn it would be a little different than in kitchen cotton. Perhaps the number of color changes and loose ends would be an issue. I really did enjoy making this. Will have to do it again sometime!

Tuesday, November 30, 2010

And finally, the squares before the last square (for now)

Darn! I already posted a snapshot of the Blue Chrysanthemum. Surely it's lovely enough to look at twice ;o). Don't remember if I mentioned here or in my notebook that I never imagined working a decrease upside down to make upside down triangles, as the purple ones around the border. (At least that's how I recall it; looking back at notebook it was a 3hdc cluster...) And my crochet experience is fairly limited.

Besides the patchwork (last square) this is another square I'd consider making enough of to make an afghan, or maybe just a lapghan. That I'd consider it at all is very complimentary indeed! (Perhaps the illusion star blanket as well...)


Kinda camouflaged, which had run out of sage green earlier, is done now.  The pattern is a sample block #4 from Melinda Miller's Sensational Sampler Afghan/Lapghan. (Sorry, Ravelry link is the only one I have for that.) Find it on her blog as well. It reminds me of the dip stitch knitting patterns, only in crochet. Makes for a double-sided design, or at least I have trouble telling the front from the back.  Actually, that's a theme for me lately, but understandable considering some of the pieces I was referring to.


Above is sample block #1 from the same Sensational Sampler. It kind of reminds me of atari game backgrounds. I think it would work equally well turned on it's side, too, so it seemed like a good idea to take a second sideways picture of it.

This is the Hugs N Kisses 12" square by Aurora Suominen. I really enjoyed crocheting this, learning the popcorn stitch, back cross stitch, and front post dc and fptc. Those sure add dimension! I don't understand why this photo appears so much closer to the true color in my photo program than when uploaded and viewed in the browser. It is a lovely and sophisticated blue and not the faded dishwater version it appears to be wherever I post it online. 


For that matter, the light blue in the atari blocks (a single square) above is really a dusty/country blue, not a clear and icy cyan. The lighter purple in that square always looks sickly; it's as anti-photogenic as I am!


Oooh - next are the checkerboards, one blue/green and the other berry colored (violets, or technically orchids).


This design works equally well right side up and upside down, or rather the illusion is viewable from both directions. I didn't want to guess or change the pattern and thought it would be easiest to just put a border on it to bring it up to 12" square. I thought the border could be more interesting if it were placed only along two edges, allowing for a wider border. I did miscalculate and picked up as many stitches as rows when picking up stitches to make the green square in the corner. 


The pattern, Checkerboard Illusion Tutorial by Susan Mrenna, works just fine, but if I were to do it again, I think I would enlarge the design. It seems it would be amazing with bigger squares. Actually her pattern is exceptionally well written and thoroughly enjoyable to follow, not just telling you what to do, but why and pointing out how and when you can first really see the illusion.  I do not mean to sound unenthusiastic about it. I think it's the nature of squares. They are not the most dynamic of shapes, compared to say stars or tulips. I should have recalculated it to make bigger squares in the checkerboard. In the 8" square that the pattern makes the checks seem appropriately sized.


And so the berry colored version, right side up and upside down:


 With this square I crocheted the border, mostly for expediency. Crochet is just so much faster under many circumstances. Hmmm, only now realizing up til these all the squares on this page were crocheted!

Monday, November 29, 2010

I'd decided against this, then changed my mind: Part 2

Now it's two posts ago that I typed the following and then changed my mind:
I'm thinking there's probably no reason to devote time to words and photos explaining how I cheated the yarns into place. They only needed to be moved from a connected corner either right to the next corner or up to the next corner. Moving right was super easy and I got in the habit of pulling the last yo back out of the last dc made and completing that yo with the new color. It drapes a short strand of yarn across the chain 3 space that you'll be crocheting into. So the 3 dc that go into that chain 3 space will cover it up nicely.

This will be the short post, ha ha! Or not, I thought this was the more intuitive of the two cheats anyway. The big picture: I'm making something like the blue diagonals square, which is four 6"x6" squares sewn together, but crocheting the 12"x12" in one piece. I'm using SmoothFox's Diagonal Box Stitch Square 6x6. It's not designed to be used this way, but I was determined to tweak it into what I wanted. When the diagonal stripes need to go in a different direction the color strands needed are not quite where they need to be, but close.


I need the yellow and white yarn to move to the right corner of the green square so that it's at the corner to the left of my hook. We'll just drape that yarn across the top of the green square between my just finished green square and the place where the yellow/white yarn is coming from.


To start with, I like to pull the final yo of the last dc out and put the two loops it was pulled through back onto the hook. (That's just a method for changing color so the first stitch in the new color isn't wearing the old color for a hat; the last loop the yarn is pulled through will be the one on top so it might as well be the new color.) You can see the final stitch is shorter because now it's missing that last yo and draw through.


It took me a few tries to figure this out, but I also like to have the old color strand (green here) in front of the work before catching the yellow/white yarn (new color)


and pulling it through the two green loops to (again) finish the last dc of the green square on the right.


The yellow strand in front is across the top of the green block from the last row and the strand further back goes to the skein of yellow/white yarn.

And I've draped the green across the yellow strands.  (That's to catch it in the slip stitch coming up; otherwise it will hang from the middle of the green block and on the wrong side when you next need it.  This will put it in the corner at least, where it would have been.)


Guide the hook under the chain 3 at the top of the left green square, which is taking the hook over/in front of the green strand and under the yellow strand that sits along to top of the green square.  Grab the yellow strand in back that leads to the skein


and pull a loop through the chain 3 space


then pull the new loop through the other yellow loop, making a slip stitch that connects the corners of the two green squares.


Begin square as in pattern. Here I've already made the first 3 chains, and am making the dc next to those.  The dcs are made through the chain 3 space of the green square and the yellow strand we pulled across the top of that will be trapped in the bottom of the dcs.


1 dc is made and you can see where both the green chain 3 and the yellow strand pulled across it are being covered.

That yellow strand pulled across (many steps back) just needed to be long enough to reach across the green square. No extra slack was needed.


Again, this may be completely obvious to anyone who does any amount of crocheting.  It took me some tinkering to figure out because the pattern I was using was designed to make diagonal stripes in one direction.  When I got to places where I needed to change direction of the colors to make a diamond I had to improvise and play a bit. If nothing else, when I make this again I'll have step by step notes about exactly how I did it! Hurray for that!

I'd decided against this, then changed my mind: Part 1

In the last post I initially typed the following:
I'm thinking there's probably no reason to devote time to words and photos explaining how I cheated the yarns into place. They only needed to be moved from a connected corner either right to the next corner or up to the next corner. Moving right was super easy and I got in the habit of pulling the last yo back out of the last dc made and completing that yo with the new color. It drapes a short strand of yarn across the chain 3 space that you'll be crocheting into. So the 3 dc that go into that chain 3 space will cover it up nicely.
Moving the yarn up: first I tried catching the strand in the last dc on the left of the square before (moving diagonally; the rows march diagonally, up and left each block to make a row). Just put the strand over or under the working yarn before pulling a yo through to make the dc. (This does leave little contrasting dashes, but they're next to the color they belong with.) Then I finally got the bright idea to borrow from the original pattern. I started using slip stitches. When the color needed to move up to the next corner it would have been going from the lower right corner of a square in the previous row to the upper right corner of the same square. The loose strand was just waiting there in the lower corner. So I started making a loop through the top of the lowest stitch in the square and then making slip stitches up the top of the stitches next to it.

And then by the time I got to here I realized that many words about crochet without pictures to back it up is a disaster. Fortunately I took pictures while cheating the colors into place. Uncertain as to the quality, but here goes! Well, backing up a minute. Overall I'm making something like the blue diagonals square, which is four 6"x6" squares sewn together, but crocheting the 12"x12" in one piece. I'm using SmoothFox's Diagonal Box Stitch Square 6x6. It's not designed to be use this way, but I was determined to tweak it into what I wanted. When the diagonal stripes need to go in a different direction the color strands needed are not quite where they need to be, but close.


I need to work a square above the blue/yellow one to the left of my hook.  But the strand is at the bottom corner of that square and I need it at the top corner, next to the hook.


I take the hook and put it through the top of the bottom most stitch in the blue/yellow square, drawing the strand that's there through the top of the stitch to make a loop. 


Leave that loop on the hook for now. Draw a loop through the top of the next stitch and pull it through the first loop.  That's making slip stitches to bring the yarn up to where it needs to be.


Two slip stitches made, one in each of lowest two stitches in blue/yellow block. (The stitches in the previous row of blocks face sideways because the pattern gets flipped over and worked back once you get to the edge.)


Next the blue loop is going to need to be where the yellow white one is. It's replacing the last yo and draw through in the last dc in the yellow white block. That follows the theory that when you want to change colors you change in the last yo of the stitch before (or else the next stitch you make is wearing a hat that doesn't match).


So carefully pull the yellow/white loop out, put the two loops it held on the hook, put the hook through the blue loop


and pull the blue loop through the yellow/white ones, again completing the 3rd dc in the yellow/white block.

Start the blue/yellow block just the way the pattern says, beginning with a slip stitch into the 3 chain space. My thinking is by finishing the last stitch of the previous block with the new color the old color doesn't reach into the new color. 

Earlier on I was disguising the color by winding it through the strands in the last dc of the color block before it's needed.  That would have been taking the blue and draping it over or under the yellow/white yarn before each yo and draw through in the yellow/white dc. But that does leave little strands of blue visible.

I'm not the best explainer, but these notes will help me to recreate it the next time I work this pattern this way.  It's written to just have the colors going in one diagonal direction.  Doing that doesn't require the threads to be moved to the next open corner.  I just wanted the effect of having sewn 4 small squares together without having to do it.  The construction of the diagonal box pattern doesn't really leave good edge stitches or any selvedge for nicely sewing through. Then there's the reality that I don't know crocheting nearly as well as knitting. Could be this is very very basic crochet technique that I just never learned.