Wednesday, April 20, 2011


Friday, April 1, 2011
The fourth or sixth time is a charm, I think

The llamas body is only just started, but I improvised what it's going to look like with the body parts that I do have done. It will be far cuter when I get to the top of the head and the loops that match the colors on the face.

To visualize how the extra colors would look I sampled and painted colors over a snapshot of Frenchy, the first llama. I tried several versions and arrived at the last after realizing that the color that I'd thought was the darkest llama yarn I had wasn't the darkest after all. Following the coloring I saw on a llama called Macarena, I needed a lighter dark for the loops on the top of the head and a darker dark for the face color around the eyes. One of the most visible things my new llama is still lacking is a nose and mouth. (Well besides a completed body and also overlooking the fact that the eyes and eyelids are just pinned on.) For Frenchy I deliberately made her nose with curly nostrils because it seemed so many llama portraits showed sculptural nostrils. Lately I've been thinking she looks slightly melancholy, so I'm hoping to create a more joyful expression for my new llama.


 |
| A very early version of my color/stitch chart |
I needed a more precise model for figuring out the actual placement of color on the face, so I ultimately used blocking pins to frame where the color changes should be based on my colored photo and the coloring on the inspiration llama. I made a chart for myself based on this. I don't know that it's a type or method of chart that anyone else uses, but it made sense to me. I started with a hand drawn version of ovals arranged in a circle. Where I needed to make an increase I drew a line through the middle of an oval to make two stitches out of one. And on the next row there would be an additional stitch as a whole oval.

Wednesday, March 16, 2011
Intarsia in the round face
 |
| Pixie Hound |
 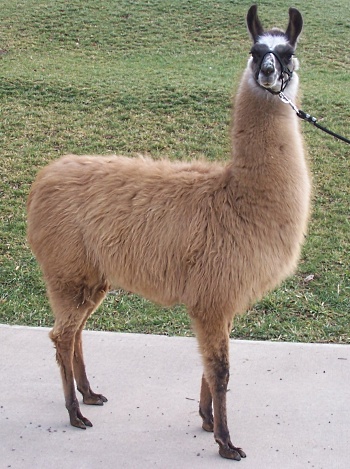 |
| http://www.llamalove.com/catalog/escalade08.htm |
 |
| http://www.oakrestllamas.com/femalesforsale.html |
 |
| http://www.minnesotaminis.com/lcp/?cat=9 |

Next I'm focusing on the colors on the face. It's a bit hard to tell, but I plan that the dark brown areas will be under the eyes. I'm crossing my fingers that it's going to work out okay. It is intarsia in the round using a technique I learned from the Inside Intarsia with Anne Berk dvd.
Thursday, March 10, 2011
Four at a time llama llama legs
|
| French Silk, aka Frenchy. This first llama was crocheted. |
Techknitter's disappearing loop cast on was essential as I never had a method for knitting a circle from the inside out before. That was one of the easy things to do in crochet that I wasn't sure I'd be able to do knitting. The second obstacle was figuring out how to knit a loop stitch. Actually, I found a few methods and all of them required me to turn the work when I got to loops rows just like crochet does. The technique I adopted was to draw a loop over my left index finger and then pull both of the loop strands through the stitch still on my left needle. (I knit continental.) Then I move the 2 strand loop from the right needle to the left needle and knit through the back loop the 2 new loops along with the one from the previous row that was still waiting on the left needle. I saw a method demonstrated on YouTube that uses American/English style, but I really don't want to convert to a method I find clunky and labor intensive. Not when I can hold the yarn in my left hand as if I was crocheting and have my left hand take up some of the work by pivoting back and forth. Seems there are a few variations which instruct one to alternate loop stitches rather than loop rows. I'm finding that loop and regular knit rows alternated seems to produce a greater row height than plain knit rows alone. Since I have many rows to alternate I'm just going to keep going and when I've knit more than an inch high I'll measure it and decide how to adjust the number of rows to knit.

What makes knitting so completely superior to crochet?
The ability to work multiple items at the same time on the same needles is the best reason I can give. I'd started each of the feet individually and then worked them up to equal points and put them all on two circular needles. The same method that Cat Bordhi introduces in Socks Soar on Circular Needles can be used to knit a single cylindrical type item in the round, but you also can continue to add extra work (I only do copies of the same item and line them up in the same place to avoid confusion) as long as you have a free end of yarn to knit with.
For socks, I wind up about half a hank of yarn into a center pull ball, then take if off the ball winder and set it into the middle of the box of my Tilta Swift. I'll take the remainder of the hank off, turn it inside out so the inside end is on the outside, then using that end wind up a second center pull ball leaving the yarn that connects the two uncut. I usually drop these siamese twins into a small yarn sack and work from each end at the same time. It can be a bit funky casting on for two at a time. I really can't explain just how I do it myself even. Sometimes are clunkier than others. But with this method I can be assured that my socks really are twins. There are times (might not happen now) when I've had to make a decision about something and not been certain of exactly how I interpreted an instruction or improvised to be able to do the same thing again in a second sock. Finally, I really don't have the correct personality for doing the same thing two or four different times if I can make two or four versions at the same time. The only trick then, and you learn it fairly fast, is to make sure you are using the correct yarn end for each sock or item. Each one needs it's own end of yarn. This is a trick I use when I'm not sure I'm going to have enough yarn, like in the llama feet, but I want to use up as much as I can of the first color or want to be certain that the second color will start in exactly the same place on multiple items. (The llama legs don't start with a different color in the same place because I decided synchronized color changes was not a requirement for this project.)
With socks you will need to work one heel at a time at the part of the pattern where your rounds turn into rows. It's such a short amount of the whole that even I can manage it. The only other difficulty is when you are working patterns with decreases. The order for your work is to knit side A of sock 1 then side A of sock 2 then side B of sock 2 and side B of sock 1. You may find that you need to k2tog with one stitch on one circular needle and one on the other AND there is no way to reach it yet. If it's on the right end in the right direction (will usually be the second sock or the one that's on your left at the start of each new round) you just slip the stitch from one needle to the other. But if it's the last stitch on the first needle for the first sock you won't get to the second k2tog stitch until you've completed the second half of the second sock. But this is easy to work around by slipping the first k2tog stitch off onto a removable marker or suitable safety pin and then sliding the marker onto the second needle where the second stitch for the k2tog lives.

I realize this would be better with more pictures to tell the story, but really, I'm not feeling up to illustrating all of it with examples. And there's probably information about this in other places that truly are more like resources anyway. I always look to Techknitter first when I have any question or challenge. She is amazing. Maybe later I'll mention how I kitchener stitched the first leg back together using her knitting needle (not tapestry needle) method. Or I'll just link it now because I'm feeling lazy - no efficient. Efficiency rules.
Friday, March 4, 2011
Well this has taken far too long
I've been away much longer than I expected. Not in body so much as in mind. I'd just been detoured onto omgpop via yahoo and playing way too much Draw My Thing. It was such great fun for quite a while. And then I found myself tangled up in a rift between two other players, which has tarnished the experience quite a bit for me. I think it will be fun again, but in the mean time I'm limiting my time there and focusing my attention and energy on other fun things that I had been neglecting.
Had I not been distracted I probably would have the second llama finished already. I am knitting a crochet pattern. I checked the gauge and am hoping now that I made a note of that in Ravelry so I can be sure what my numbers are. I do have the recollection that I need 2 more knit rows to equal the same height of crochet rows.

My progress so far is a barely started body, three feet and a leg that could be in the half done range. Had a terrible time getting a decent photo of the three feet. I was working each on double points until I got to 42 sts in the round and started knitting the first 2 together on a set of two circulars. Realizing I was running low on the dark brown for feet I clipped on strand and started the third foot, knit until I ran out of color and then switched to white. Ultimately all where switched to white and when the progress on the third foot had caught up to the first two I put it on the circulars as well.
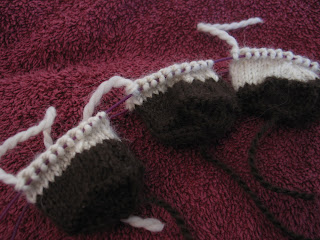
I reviewed as many llama photos as I could, paying particular attention to the feet, and concluded that often their feet do not all match. So my second llama will look like it's wearing spats that are uneven. I don't even know what I will do for the third llama yet, but I have llama yarn for it, possibly even a fourth.
After photographing the feet and leg I noticed a mini-skein of what I think is Malabrigo sock that was sent to me as a sample when I ordered other yarn. I hope at some time I'll verify where it came from, but I suppose it isn't absolutely necessary. I am pretty sure of what it is just from memory, but not the colorway. I kind of hope there is enough there to make a sock for my sister's sock monster. Otherwise, I am not sure just what I'd do with a very small amount of sock yarn.
Had I not been distracted I probably would have the second llama finished already. I am knitting a crochet pattern. I checked the gauge and am hoping now that I made a note of that in Ravelry so I can be sure what my numbers are. I do have the recollection that I need 2 more knit rows to equal the same height of crochet rows.

My progress so far is a barely started body, three feet and a leg that could be in the half done range. Had a terrible time getting a decent photo of the three feet. I was working each on double points until I got to 42 sts in the round and started knitting the first 2 together on a set of two circulars. Realizing I was running low on the dark brown for feet I clipped on strand and started the third foot, knit until I ran out of color and then switched to white. Ultimately all where switched to white and when the progress on the third foot had caught up to the first two I put it on the circulars as well.

I reviewed as many llama photos as I could, paying particular attention to the feet, and concluded that often their feet do not all match. So my second llama will look like it's wearing spats that are uneven. I don't even know what I will do for the third llama yet, but I have llama yarn for it, possibly even a fourth.
 |
| It's prettier in person ;o) |
Tuesday, January 25, 2011
Viva la realizacion
Hurray! French Silk, my Llama llama, is finally finished.
Even her Peruvian hat is done.
Thursday, January 20, 2011
Knit a llama llama, a drama llama
I've started a knit version of Coquena the llama and am using llama yarn, of course, progress toward an eventual fiber menagerie. I measured my crochet gauge, which was 7 stitches and 7 rows to the inch. Then I knit the foot after finding TechKnitter's Disappearing loop method of casting on in the middle. It is an excellent method. To avoid the time and effort knitting a gauge piece for gauge's sake and knitting it in the round I just planned to measure the gauge in the column of the lower leg. Turns out that using the same mm needle as the size crochet hook I'd used (and same yarn, but different color) also yielded 7 sts to the inch, but 9 rows to the inch instead of 7. To compensate for this I added 2 rows for each 7 rows which made the row count for the lower leg 22 instead of 17. (14 + 2 + 2 + 3 + 1; 2 for each block of 7 rows, 3 rows to finish off the original 17 in the pattern, plus one additional row because 3 is nearly half of 7 and I add 2 with every 7. I'm sure I have not accounted for that in a very clear way, but that's all that comes to mind in way of explanation at this time.)
Didn't notice this llama already named French Silk before I named my crocheted version. I based her color pattern on this llama with a painted coat. And then when the yarn arrived the combination reminded me of the chocolate pie with that name.
Unless I change my mind I'm planning to pattern the colors on the knit llama mostly after one called Macarena. She and a few others I saw in photos have very dramatic white faces with black eye patches and rust colored bodies. It's a very dramatic look I just have to attempt.
Poor French Silk, my unfinished crocheted llama llama. She's in pieces.All Nearly all of her pieces are completed, but sewing together is often a place where I cast on something new instead.
I'm really excited about knitting a llama llama. I'd much rather knit anyway, and crochet, especially crocheting stuffed toy tight, is very hard on my hands. Also, whenever there are duplicate pieces to work I knit them simultaneously using a pair of circular needles. I cannot crochet two pieces of anything at the same time. It worries me that the duplicates might not match exactly and it just seems slower to do them one at a time. Since this is a stuffed animal and not a garment I am very hopeful that the knit version will be simple to engineer and will very closely resemble the crochet original, only smaller, probably. I am a little concerned about the way that single crochet produces a much denser fabric than knitting. I don't think I'll be able to stuff a knit version nearly so tightly as a crocheted one.
Crossing my fingers! Well, figuratively crossing them; they're actually busy knitting or typing about the knitting. Honestly, I kind of like the white ring around the ankle on the knit leg. What I was doing was putting in two knit rows with "waste yarn" to make it easy to remove the unaltered foot (without extra rows to compensate for the comparative shortness of knit stitches) and replace it with one reworked to a taller proportion. I'm kind of leaning toward not only leaving the white ring, but making all the other feet to match this one. It's a decision I'm going to postpone for a bit. I have not yet mastered or even attempted a knitted loop stitch. There's a pattern for it in a book I have. Besides that, the only other concern I had about knit construction was with starting in the middle of a tight circle. Presto! TechKnitter's disappearing loop method pops up. Thanks so much TK!
 |
| Poor Frenchy, assembling her for a pic I see one arm is incomplete and the other not stuffed! |


Unless I change my mind I'm planning to pattern the colors on the knit llama mostly after one called Macarena. She and a few others I saw in photos have very dramatic white faces with black eye patches and rust colored bodies. It's a very dramatic look I just have to attempt.

Poor French Silk, my unfinished crocheted llama llama. She's in pieces.
 |
| Drama llama's leg is definitely coming out smaller so far. |
Crossing my fingers! Well, figuratively crossing them; they're actually busy knitting or typing about the knitting. Honestly, I kind of like the white ring around the ankle on the knit leg. What I was doing was putting in two knit rows with "waste yarn" to make it easy to remove the unaltered foot (without extra rows to compensate for the comparative shortness of knit stitches) and replace it with one reworked to a taller proportion. I'm kind of leaning toward not only leaving the white ring, but making all the other feet to match this one. It's a decision I'm going to postpone for a bit. I have not yet mastered or even attempted a knitted loop stitch. There's a pattern for it in a book I have. Besides that, the only other concern I had about knit construction was with starting in the middle of a tight circle. Presto! TechKnitter's disappearing loop method pops up. Thanks so much TK!
Wednesday, January 19, 2011
Hat making party
Sunday I went to a Mardi Gras hat making party. A group of seven friends are going to Mardi Gras. Besides having fun, their mission is to collect beads to recycle on local parade routes later in the year. Why not? Beads are expensive and they'd be buying them themselves otherwise.
On the Monday after Christmas Mic and I went to see Little Fockers and have dinner at Olive Garden. After that we shopped at Michaels craft store and found a selection of Christmas decorations on 70% clearance or so. Mic saw some items in purple, gold, and green and thought it would be fun to decorate hats for the next Mardi Gras trip.
I made a sketch of the hat that I worked on. This is what it looks like, as best as I can remember and within the limits of what I can illustrate in markers without drawing everything out in great detail first.


On the Monday after Christmas Mic and I went to see Little Fockers and have dinner at Olive Garden. After that we shopped at Michaels craft store and found a selection of Christmas decorations on 70% clearance or so. Mic saw some items in purple, gold, and green and thought it would be fun to decorate hats for the next Mardi Gras trip.
I made a sketch of the hat that I worked on. This is what it looks like, as best as I can remember and within the limits of what I can illustrate in markers without drawing everything out in great detail first.

ETA: there are two gold apples, one gold ball, three purple balls, several purple feathery shaped items, green glittered balls on green glittered wire, two gold beaded strands of round gold sequins, small purple balls on purple wire, a green ribbon band, and a green bird sitting on purple leaves and foliage. All of this is mostly wired and to a lesser extent hot glued to a straw colored cowboy hat. It may be missing some features in the real version, but this is mostly the gist of it. The drawing reminds me how out of practice I am in drawing lately. I suppose no illustration would have the impact and immediacy of the real thing.

I thought maybe that would add some perspective, but adding a drawn hat to a photo doesn't really bring it to life so much. Oh well!
ding DONG! Aarufff, Rruff, RrawFFFF!

No! The house finally has a working doorbell again and that was it (probably autofocus and no flash, but I'm not sure.) Every step installing it has had some complication or another, making it an enormous pain in the butt over several days. I'm most upset about the inaccurate description posted by the online retailer AND how one of their employees called to argue with me about it and insist my complaint was just a matter of semantics. Accommodating that one difference they dismiss is what set off an avalanche of problems. But I really don't have the energy to go through it step by step.

And it certainly is a huge improvement over the old doorbell button, which had endured sloppy paint jobs and about 21 years of use. At first it was still operable even with the duct tape over the missing button section. I'd applied that because of the way the button on it had broken. I wanted to be sure no one would be at risk of cuts or shock from using the button, but needed to leave it in place while securing a replacement.

I really should do some touch up sanding and painting to really finish the installation. I even took out the matching paint when I started this project. But it's been so much extra trouble already and I am truly exhausted. Unfortunately next time there's a problem, new wires are going to have to be fished through. Every bit of extra slack was used up in this fix (not my plan at all, just kept going that way) and I found that the insulation on the wires came off easily, seemingly without even touching it at all. And the smallest manipulations tended to snap the wire right off.
Sunday, January 9, 2011
Praise for a great pattern

Holy cow! I just discovered that in the pattern I'm working there's a link to a video tutorial demonstrating how to make the loop stitch AND I think she is using a more movement economical way of rewrapping the yarn in the opposite direction. Otherwise, it was easy enough to learn this stitch just following along with the photo tutorial in the pattern.
BTW, I have memorized the lyrics to the Llama llama duck song. It amuses me for reasons I can't or shouldn't explain. If I understand correctly, the "Not a llama" image displays an alpaca, which looks a lot like a llama, but doesn't have the llama's banana ears. (You can see what I mean in the next post. Wasn't planning on it, but occasionally my thoughts fall into linear arrangements.) That's my conclusion because I've been browsing so very many llama photo rich websites to observe colors and patterns and plan future llama llama projects. At some point I read that the ears were a major distinguishing feature.
How much more trouble can I get into?
Well the end of the last post unexpectedly segues into this one. Something that won't happen often and I suppose I shouldn't care since the posts appear in a reverse chronology anyway. Or rather it did, and then I was editing multiple posts at the same time and then taking out a section to make a post of it's own. Now it actually works from top to bottom. This kind of chaos sounds a lot more like me ;o). I was mentioning a video tutorial and also my accomplishment of learning the lyrics to Llama llama duck. Which means I am often humming it when I am not absentmindedly humming the theme song for one of Investigation Discovery's new shows. I think it's the theme song... wouldn't know really, it's what they play in the background of the commercial for it. But then I tend to hum random commercial tunes and theme songs without realizing it all the time anyway...
 I stumbled into setting up a YouTube account without really wanting to. All I wanted to do was give a good rating and favorable comments to a video I admired. And Google bullied me into setting up yet another account. I felt fairly discouraged about my inability to find any use for having a YouTube channel of my own. But as I poked around a bit I started to realize that while I don't really plan to make videos myself at this time I should be able to use my channel to collect and organize videos I like and especially those video tutorials for knitting and crocheting that I might refer to over and over. Like Cat Bordhi's Slim and Trim SSKs tutorial featuring her memorable hungry stitch method.
Did you get a look at the doorbell button ad in the upper right corner? I find it fairly creepy and certainly suspicious that earlier in the evening I looked at doorbell buttons online, possibly for a few hours even. While I probably won't choose that style I do find there's something enticing about a doorbell button labeled PRESS, just like that in capital letters and everything. I'm sure there's a reason for the apropos nature of the ads and these circumstances are directly related. I'd feel a little better with some sort of proof or acknowledgment of it though. And maybe some guidelines so that all my browsing doesn't produce ads on my channel for everything. Not that there's anything I'm browsing for that's out of bounds. It's just too big brother, too mundane, and just not necessary.

I suppose it's fairly newsworthy that the doorbell button I need to replace (at left, in all it's painted over and dilapidated glory) lasted for about 21.5 years. The manufacturer should be glowing with pride, especially since I've been reading that doorbell button life spans can be as short as 4-11 years. Truly, I don't know how the push button plastic part of it managed to escape dry-rotting and shattering years ago, except that it is very well shaded and weather protected. Even in it's duct-taped and sorry current state it does still work. But it is time for a replacement.
 This round one I copied and printed out at life size could be a contender, but it's a bit too yellowy goldy. Who wants to snoop on this kind of news, really?! Find me a lighted surface mount button that's clever, beautiful, and has a dark or coppery finish and we can call it even.
At least I have a lead on a local business where I might be able to see some stock in person. I think if I'd signed up for a channel earlier then there would be ads for llamas instead ;o).
So that's all that's there is so far on my brand new channel. I'm tempted to try making a video of using my Tilta Swift and ball winder to wind a center pull skein. It really works remarkably well and just took a bit of practice to get consistently good results. But to avoid colossal embarrassment I would have to do a lot of putting away of half finished projects that are cluttering up my work space. It's nearly unbearable at times on it's own, just from the lost but around here somewhere supplies alone, but I only have so much energy and that's so much less that what I should have. Besides that, there is nothing I can say about it that would convey such a terribly negative impression as allowing it to appear as the background in a video. That makes two obstacles: reliable or certain means of capturing video and massive straightening to remove unsightly backdrop. Maybe someday I'll get to it. Would love to get everyone using a Tilta Swift - so clever, so economical, so many items you already have on hand that could be put to fabulous use. And a video would be far more convincing than a sparse beginner slideshow.
There's nothing there to see really now, but when it really seems presentable I'll add a link. Cheers!
 I stumbled into setting up a YouTube account without really wanting to. All I wanted to do was give a good rating and favorable comments to a video I admired. And Google bullied me into setting up yet another account. I felt fairly discouraged about my inability to find any use for having a YouTube channel of my own. But as I poked around a bit I started to realize that while I don't really plan to make videos myself at this time I should be able to use my channel to collect and organize videos I like and especially those video tutorials for knitting and crocheting that I might refer to over and over. Like Cat Bordhi's Slim and Trim SSKs tutorial featuring her memorable hungry stitch method.
Did you get a look at the doorbell button ad in the upper right corner? I find it fairly creepy and certainly suspicious that earlier in the evening I looked at doorbell buttons online, possibly for a few hours even. While I probably won't choose that style I do find there's something enticing about a doorbell button labeled PRESS, just like that in capital letters and everything. I'm sure there's a reason for the apropos nature of the ads and these circumstances are directly related. I'd feel a little better with some sort of proof or acknowledgment of it though. And maybe some guidelines so that all my browsing doesn't produce ads on my channel for everything. Not that there's anything I'm browsing for that's out of bounds. It's just too big brother, too mundane, and just not necessary.
I suppose it's fairly newsworthy that the doorbell button I need to replace (at left, in all it's painted over and dilapidated glory) lasted for about 21.5 years. The manufacturer should be glowing with pride, especially since I've been reading that doorbell button life spans can be as short as 4-11 years. Truly, I don't know how the push button plastic part of it managed to escape dry-rotting and shattering years ago, except that it is very well shaded and weather protected. Even in it's duct-taped and sorry current state it does still work. But it is time for a replacement.
 This round one I copied and printed out at life size could be a contender, but it's a bit too yellowy goldy. Who wants to snoop on this kind of news, really?! Find me a lighted surface mount button that's clever, beautiful, and has a dark or coppery finish and we can call it even.
At least I have a lead on a local business where I might be able to see some stock in person. I think if I'd signed up for a channel earlier then there would be ads for llamas instead ;o).
So that's all that's there is so far on my brand new channel. I'm tempted to try making a video of using my Tilta Swift and ball winder to wind a center pull skein. It really works remarkably well and just took a bit of practice to get consistently good results. But to avoid colossal embarrassment I would have to do a lot of putting away of half finished projects that are cluttering up my work space. It's nearly unbearable at times on it's own, just from the lost but around here somewhere supplies alone, but I only have so much energy and that's so much less that what I should have. Besides that, there is nothing I can say about it that would convey such a terribly negative impression as allowing it to appear as the background in a video. That makes two obstacles: reliable or certain means of capturing video and massive straightening to remove unsightly backdrop. Maybe someday I'll get to it. Would love to get everyone using a Tilta Swift - so clever, so economical, so many items you already have on hand that could be put to fabulous use. And a video would be far more convincing than a sparse beginner slideshow.
There's nothing there to see really now, but when it really seems presentable I'll add a link. Cheers!
Llama llama in progress
I've completed maybe half the work on my Coquena the Llama llama project having bought llama yarn in two colors and then buying more from additional online retailers after running out. Actually they all tended to have little stock in the colors I wanted.
Now they have nearly all arrived (except for a single hank of Mirasol Miski in Snowdrop #100 that Webs owes me). Miraculously, they all have matching dye lots across all sources - so far anyway.
Referring to the last image: the white starts after I used an entire skein of brown (Mississippi), coffee mug is just for size reference. And the images show a much earlier than current stage of completion.
I'm calling my first llama llama French Silk since the yarn used (Mirasol Miski in Mississippi and Snowdrop and Elsebeth Lavold Baby Llama in Dark Brown) remind me of the chocolate on chocolate pie with the same name.
Ran into a bit of a snag missing or forgetting part of the instructions to make my coat loop stitches about 2" long. Noticed it by the time I'd gotten to the tops of the legs where the directive is repeated to make 2" long stitches and emailed Paola to find out why the loops on the tops of the legs where 2". She very kindly explained that they should be the same length as on the body and that the body instructions call for the same size loop. I'm so glad I asked! I'm going to redo the top of the one leg that had loops so far and make them match the loop size I used on the body. French Silk has been more recently sheared than Coquena, that's all.
Was going to hold off posting until I got a few better pics representing current state of progress. But that's going to make an even BIGGER, more tiring post by the time I'd get around to finishing it, so I've changed my mind (well, obviously!).
This would make more sense if I hadn't deleted references to struggling with trying to match the eye highlights and reworking over and over. On my next try, which could be the 7th or 11th I'm going to use a single strand, although the right one I'm trying to match was done in a double strand. Seems that with a single strand and maybe twice as many passes I'll have more control over how it turns out. You can see what I mean about the longer leg loops anyway.
Now they have nearly all arrived (except for a single hank of Mirasol Miski in Snowdrop #100 that Webs owes me). Miraculously, they all have matching dye lots across all sources - so far anyway.
Referring to the last image: the white starts after I used an entire skein of brown (Mississippi), coffee mug is just for size reference. And the images show a much earlier than current stage of completion.
I'm calling my first llama llama French Silk since the yarn used (Mirasol Miski in Mississippi and Snowdrop and Elsebeth Lavold Baby Llama in Dark Brown) remind me of the chocolate on chocolate pie with the same name.
Ran into a bit of a snag missing or forgetting part of the instructions to make my coat loop stitches about 2" long. Noticed it by the time I'd gotten to the tops of the legs where the directive is repeated to make 2" long stitches and emailed Paola to find out why the loops on the tops of the legs where 2". She very kindly explained that they should be the same length as on the body and that the body instructions call for the same size loop. I'm so glad I asked! I'm going to redo the top of the one leg that had loops so far and make them match the loop size I used on the body. French Silk has been more recently sheared than Coquena, that's all.
Was going to hold off posting until I got a few better pics representing current state of progress. But that's going to make an even BIGGER, more tiring post by the time I'd get around to finishing it, so I've changed my mind (well, obviously!).
This would make more sense if I hadn't deleted references to struggling with trying to match the eye highlights and reworking over and over. On my next try, which could be the 7th or 11th I'm going to use a single strand, although the right one I'm trying to match was done in a double strand. Seems that with a single strand and maybe twice as many passes I'll have more control over how it turns out. You can see what I mean about the longer leg loops anyway.
Saturday, January 8, 2011
Light a candle
I lit a candle for the victims of the Arizona shooting. You can light one too.
 photo from: |
| http://www.recoverresources.com/catalog/i93.html |
Sunday, December 26, 2010
Llama, llama, duck
I'm off to find llama yarn so I can make not just Coquena the llama, but Coquena the llama llama.
"...fuzzy llama
funny llama
llama llama
"...fuzzy llama
funny llama
llama llama
duck..."
Again, it's all Rebecca Danger's fault and it started with alpaca alpacas. I'll be knitting another one since my good friend, Amy, sent me some great alpaca colored alpaca yarn. Soon I'll need to find bison yarn for Delicious Crochet's American Bison pattern. Somehow in a drowsy state I came across the Llama song. Well, I was looking for llama photos to try and decide on colors.
"...llama
llama llama
mushroom
llama
llama llama
duck..."
it's more than a song, it's a flash video, and apparently will go on forever until I close that tab.
"...half a llama
twice the llama
not a llama
farmer
llama
llama in a car
alarm a llama
llama
duck..."
Again, it's all Rebecca Danger's fault and it started with alpaca alpacas. I'll be knitting another one since my good friend, Amy, sent me some great alpaca colored alpaca yarn. Soon I'll need to find bison yarn for Delicious Crochet's American Bison pattern. Somehow in a drowsy state I came across the Llama song. Well, I was looking for llama photos to try and decide on colors.
"...llama
llama llama
mushroom
llama
llama llama
duck..."
it's more than a song, it's a flash video, and apparently will go on forever until I close that tab.
"...half a llama
twice the llama
not a llama
farmer
llama
llama in a car
alarm a llama
llama
duck..."
It's quirky, it's catchy, it's completely illustrated and captioned - check it out! the Llama song
Not that I could (or would want to) illustrate the whole song, but I do have a great duck pattern already: Duggie Duck, by Carola van Groen, creator of the Mr. and Mrs. Santa Claus pattern.
I'm too sleepy to be anything but silly, so listening to this song suits me fine right now.
Merry Christmas, if it's not yet the next day.
Friday, December 24, 2010
It's Resolution Time
 |
| Playing a trick on me when I turned my back. |
I'm never far enough ahead or caught up in knitting (or crochet or anything else) to be working on anything besides what needs to be done now. So it's hard to imagine planning crafting far enough in advance to not have to worry. It's clear to me (and would probably surprise no one) that budgeting my time and reconciling my big ambitions with realistically small planning.
 |
| Fortunately this was a fast project! |
 |
| No progress since Oct. |
Then there are the mostly finished things I haven't bothered to finish, like Jack Frost, who just needs fingers and blocking, both of the Alpaca alpacas... actually I never put the embellishments on either pair of my own Malabrigo loafers or affixed buttons to Prairie Boots, which I've been wearing around the house anyway. The second of three robots only needs arms sewn on, but the third is not yet cast on. The robots, along with a land & set playset were gifts that I hoped to finish for a friend with young boys. I cast on the train for that last night and haven't made much progress.
 |
| Sherbie, Alpaca alpaca |
 |
| Deja Vu, Alpaca alpaca |
 |
| Prairie boots, sans buttons |
 |
| loafers, v.2 |
 |
| loafers, v.1 |
Nonetheless, I must admit if I were more disciplined about planning my projects and even more rigorous about finishing them before starting others, perhaps next year I could manage to have my holiday knitting/crocheting finished by mid-December and none of my birthday projects would be running late (like one for Amy, whose birthday was in April and Mic, whose b-day was in June). Of course those were multi item projects and there are some additional circumstances that caused me to delay finishing the last details of them, but still. It's almost always the last finishing steps that are the biggest challenge. So this kind of thinking really needs an audio clip of maniacal laughing to accompany it.
Happy New Year everybody. Try not to be too tough on yourself.
Thursday, December 23, 2010
Not so good timewise

This is a fleece blanket for my dad. His room is colder than the rest of his house. He folds an old bedspread in half in the winter, but I think an extra blanket will work better.
It would have taken a lot less time to just take the blanket out and wrap it. It took a bit of extra time just because the box was a rather mangled. But wrapping it would have taken a large amount of paper for someone who never unwraps gifts himself anyway. Even when I loosen tape or slice boxes open for him, he still hands things back to me saying, "open this." I push them back saying, "look, you only need to pull up the flaps" or "move the paper away." So maybe that is part of my reluctance to really wrap things, too.
What inspired me was realizing I could color a band over the LANDS' END printing on the long sides. I didn't realize that my selection of darker blue marker shades was pretty limited. If I'd been thinking ahead I would have selected 3 blue shades and possibly colored the ribbon with the lightest one. But then that wouldn't cover up the lettering.

It is ok. I didn't realize that coloring a ribbon over the lettering wasn't really the right place for a ribbon wrapped around the box. I didn't do a good job of making the bow use ribbon the same width as that colored around the box, either.
I'll try to remember these little details before I attempt this again!
So Excited - and Relieved!
 |
| One of the items in the box; a hotpad/trivet from this pattern |
The box I was reusing came from Delight.com and contained items I'd ordered earlier in the week. I'd bought a few containers from them including a water bottle that folds flat and rolls up and 3 different silicone containers: flat, folding coin purse, eyeglass case, and a mini case. So apparently I didn't buy the eyeglass case, but a nearly identically sized one that's arranged portrait-wise. What really impressed me about my order was the way everything was packaged. My items were pretty much submerged in the degradable (cornstarch based?) "ghost poo" that they use for package filler. (The filler pellets aren't styrofoam, and they dissolve in water.) It was quite an experience to have to stick my hands into the box full of puffy pellets and grope around to find the items. There was pink tissue paper layered under the pellets and lying on top of them so I had to move the tissue aside to get to the pellets. I really should have taken pictures!
I would have liked to have recreated this experience in the package I was sending my aunt, except the items I was mailing took up far greater volume in the box than the items sent in my delight.com order. The biggest items were the Clauses. Still, I re-used what of the ghost poo pellets would fit.
You can briefly see the holly leaf and berries that decorate her bun when her hat is off. I didn't realize part of the green from that was visible beneath her hat until after I'd taken the photos, uploaded them to my computer, packed the box and driven 40 minutes each way to ship it and returned home, and then browsed them in preparation for putting the photos here. oh well!
Besides the handcrafted items, I included a Hallmark ornament- a puppy whose coloring resembles Chloe's, a kit for making a pawprint keepsake item, and doggie cookies for Chloe.
Eeek! Can't believe it's taken me this long to link to the pattern for Mr. and Mrs. Claus - what a goof!
Besides the handcrafted items, I included a Hallmark ornament- a puppy whose coloring resembles Chloe's, a kit for making a pawprint keepsake item, and doggie cookies for Chloe.
Eeek! Can't believe it's taken me this long to link to the pattern for Mr. and Mrs. Claus - what a goof!
Santa Baby
Finally Santa is finished and all his pieces are assembled. But first a recap:


Here he is in pieces:


This is the way I got his hair to fit.

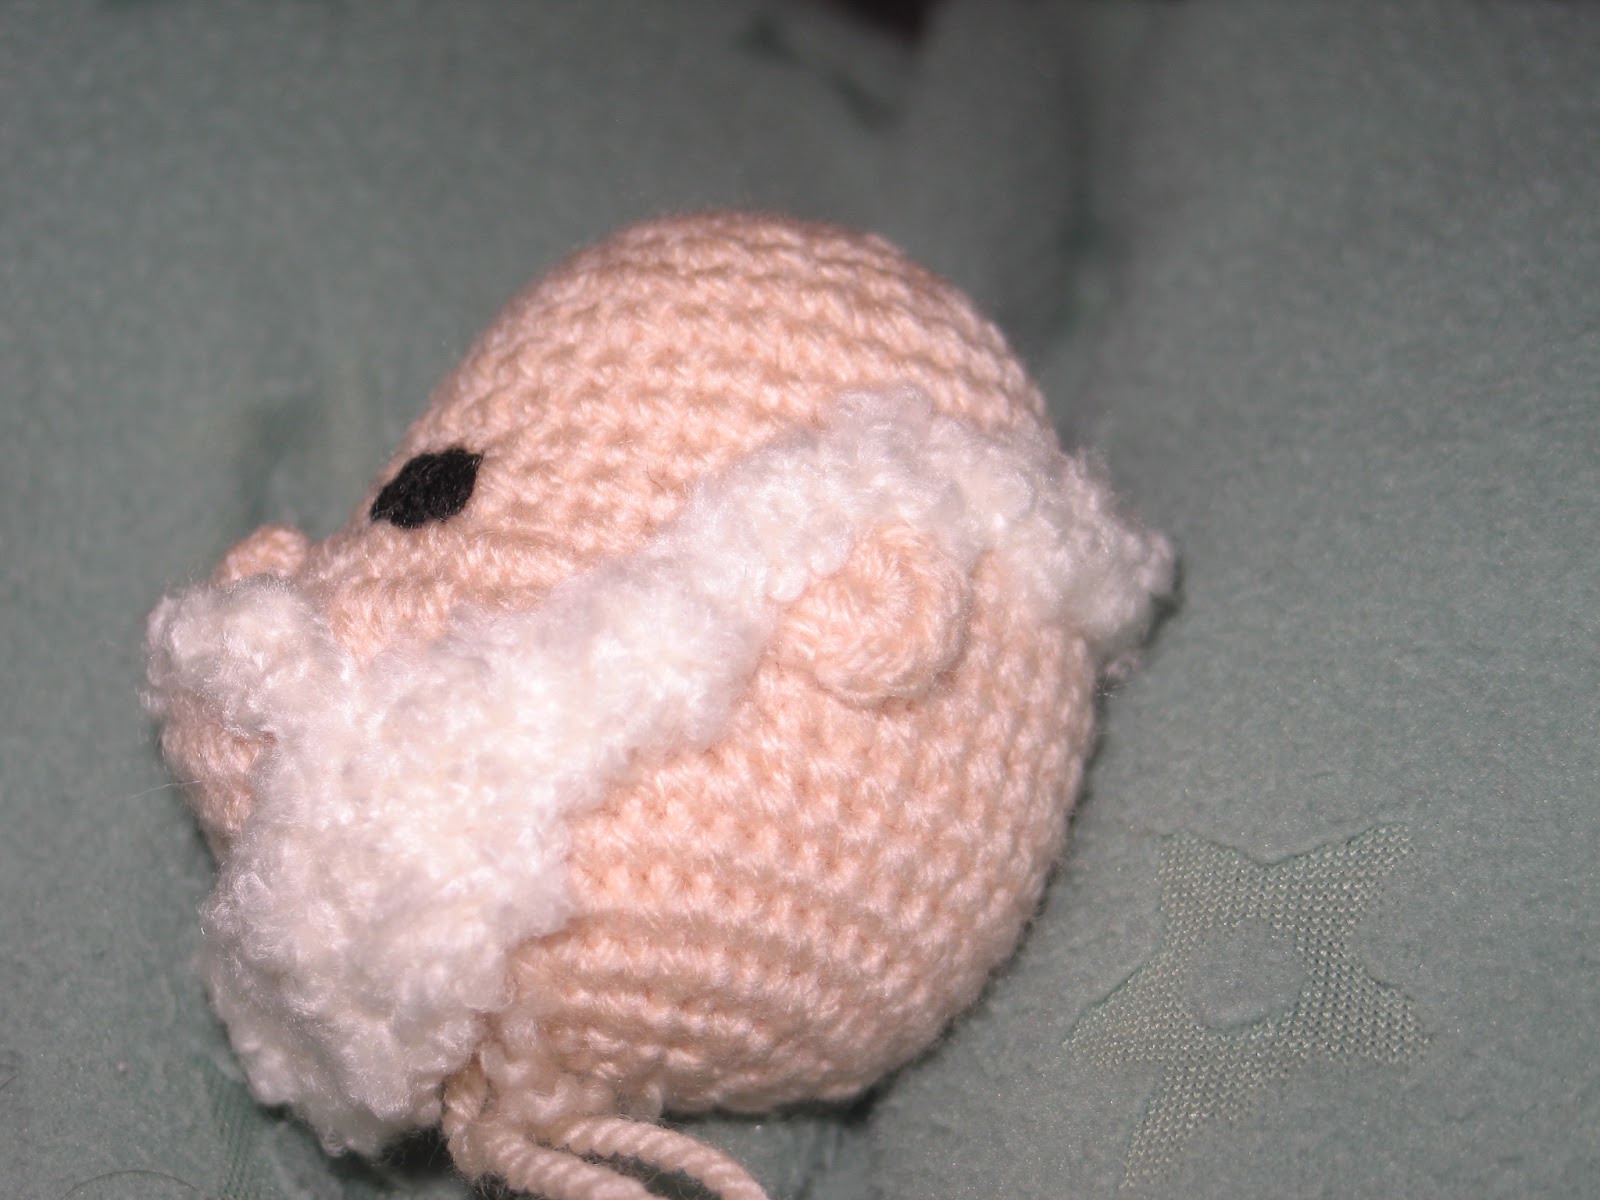

Here he is in pieces:

And waiting to get all the ends woven in, snugged tight and snipped:

Here comes Santa Claus, finished and with Mrs. Claus - up next!
Monday, December 20, 2010
Hurray for miracles!
For reasons I can't identify my sister's old camera suddenly loves me. No more oddness, all is predictable and easy. Yippeeee!!
Now, just imagine you're listening to "Isn't she lovely?" (or be a sport and hum it) and ignore the stray threads that need to be secured and clipped. If she continues to behave herself and cooperate I won't display the photos of her modeling the long underwear and clunky black boots that are under her gown.
Mrs. Claus certainly has turned out well so far.
Now, just imagine you're listening to "Isn't she lovely?" (or be a sport and hum it) and ignore the stray threads that need to be secured and clipped. If she continues to behave herself and cooperate I won't display the photos of her modeling the long underwear and clunky black boots that are under her gown.
Mrs. Claus certainly has turned out well so far.
Subscribe to:
Posts (Atom)