Sunday, December 26, 2010

Llama, llama, duck

I'm off to find llama yarn so I can make not just Coquena the llama, but Coquena the llama llama. 


"...fuzzy llama
funny llama
llama llama 

duck..."

Again, it's all Rebecca Danger's fault and it started with alpaca alpacas. I'll be knitting another one since my good friend, Amy, sent me some great alpaca colored alpaca yarn.  Soon I'll need to find bison yarn for Delicious Crochet's American Bison pattern. Somehow in a drowsy state I came across the Llama song. Well, I was looking for llama photos to try and decide on colors.


"...llama
llama llama
mushroom
llama
llama llama
duck..."


 it's more than a song, it's a flash video, and apparently will go on forever until I close that tab.


"...half a llama
twice the llama
not a llama
farmer
llama
llama in a car
alarm a llama
llama
duck..."


It's quirky, it's catchy, it's completely illustrated and captioned - check it out! the Llama song

Not that I could (or would want to) illustrate the whole song, but I do have a great duck pattern already: Duggie Duck, by Carola van Groen, creator of the Mr. and Mrs. Santa Claus pattern.

I'm too sleepy to be anything but silly, so listening to this song suits me fine right now.
Merry Christmas, if it's not yet the next day.

Friday, December 24, 2010

It's Resolution Time

Playing a trick on me
when I turned my back.
I don't really do that, but lately one specific issue that more than merits that kind of consideration has been huge drain on my limited energy and concentration. I am so tired of scrambling each year to finish and mail things, omitting Christmas cards or sending them late, and constantly feeling anxious about whether or not I'm going to finish everything I'd hoped and if it's going to arrive on time.

I'm never far enough ahead or caught up in knitting (or crochet or anything else) to be working on anything besides what needs to be done now. So it's hard to imagine planning crafting far enough in advance to not have to worry. It's clear to me (and would probably surprise no one) that budgeting my time and reconciling my big ambitions with realistically small planning.

Fortunately this was a fast project!
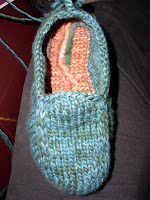
I finished the Clauses and the hotpad/trivet, but there were several other items I'd hoped to have finished by now, some not even started. I would have liked to knit a pair of Malabrigo loafers for a relative - the same one who got the Clauses and the hotpad and not the one who reads this blog. Well I wanted to make a pair for my Dad, too. It will take a bit of figuring to see if I can adjust my needle size to get a pair slightly smaller than small for my Aunt.

No progress since Oct.


Then there are the mostly finished things I haven't bothered to finish, like Jack Frost, who just needs fingers and blocking, both of the Alpaca alpacas... actually I never put the embellishments on either pair of my own Malabrigo loafers or affixed buttons to Prairie Boots, which I've been wearing around the house anyway. The second of three robots only needs arms sewn on, but the third is not yet cast on. The robots, along with a land & set playset were gifts that I hoped to finish for a friend with young boys. I cast on the train for that last night and haven't made much progress.

O. Sherbie
Sherbie, Alpaca alpaca
Deja Vu
Deja Vu, Alpaca alpaca
Prairie Boots
Prairie boots, sans buttons

loafers v.2
loafers, v.2
loafers v1
loafers, v.1


Nonetheless, I must admit if I were more disciplined about planning my projects and even more rigorous about finishing them before starting others, perhaps next year I could manage to have my holiday knitting/crocheting finished by mid-December and none of my birthday projects would be running late (like one for Amy, whose birthday was in April and Mic, whose b-day was in June). Of course those were multi item projects and there are some additional circumstances that caused me to delay finishing the last details of them, but still.  It's almost always the last finishing steps that are the biggest challenge. So this kind of thinking really needs an audio clip of maniacal laughing to accompany it.

Happy New Year everybody. Try not to be too tough on yourself.

Thursday, December 23, 2010

Not so good timewise

I don't really like to wrap gifts. I like the way they look wrapped, but just feel like I've lost patience for it and don't do nearly as good of a job as I used to do. Nothing ever comes out as neatly and sharp as I'd hoped. So I had this idea to decorate a shipping box instead.

This is a fleece blanket for my dad. His room is colder than the rest of his house. He folds an old bedspread in half in the winter, but I think an extra blanket will work better.

It would have taken a lot less time to just take the blanket out and wrap it. It took a bit of extra time just because the box was a rather mangled. But wrapping it would have taken a large amount of paper for someone who never unwraps gifts himself anyway. Even when I loosen tape or slice boxes open for him, he still hands things back to me saying, "open this." I push them back saying, "look, you only need to pull up the flaps" or "move the paper away." So maybe that is part of my reluctance to really wrap things, too.

What inspired me was realizing I could color a band over the LANDS' END printing on the long sides. I didn't realize that my selection of darker blue marker shades was pretty limited. If I'd been thinking ahead I would have selected 3 blue shades and possibly colored the ribbon with the lightest one. But then that wouldn't cover up the lettering.


It was when I looked for a photo of a bow and started drawing that on the box that I realized I hadn't left much room for shadowing since I'd started the ribbon in my darkest blue. The only way to create darker shades with this blue was to keep coloring over areas to make them darker.

It is ok. I didn't realize that coloring a ribbon over the lettering wasn't really the right place for a ribbon wrapped around the box. I didn't do a good job of making the bow use ribbon the same width as that colored around the box, either.

I'll try to remember these little details before I attempt this again!

So Excited - and Relieved!


One of the items in the box; a hotpad/trivet from this pattern
I am thrilled to be home from mailing a box of gifts to my Aunt Marge. I felt really low for missing the Priority mail deadline and feared just how much it was going to cost me to send her box Express mail. Even worse, the Clauses are more than 12" high. I don't think they are quite 14" tall... more like 13" or 13.5 or so. The postal service adds a surcharge if your package goes over 12" in any direction...or at least they do for priority mail. The woman at the main post office didn't overtly measure my box or draw my attention to that. But her scale is probably marked with a ruler along the long and close side, just like the scales at the diy kiosks. The box I was using was stamped 12 x 16 x 6 on the bottom, I think.

The box I was reusing came from Delight.com and contained items I'd ordered earlier in the week. I'd bought a few containers from them including a water bottle that folds flat and rolls up and 3 different silicone containers: flat, folding coin purse, eyeglass case, and a mini case. So apparently I didn't buy the eyeglass case, but a nearly identically sized one that's arranged portrait-wise. What really impressed me about my order was the way everything was packaged.  My items were pretty much submerged in the degradable (cornstarch based?) "ghost poo" that they use for package filler. (The filler pellets aren't styrofoam, and they dissolve in water.) It was quite an experience to have to stick my hands into the box full of puffy pellets and grope around to find the items. There was pink tissue paper layered under the pellets and lying on top of them so I had to move the tissue aside to get to the pellets. I really should have taken pictures!

I would have liked to have recreated this experience in the package I was sending my aunt, except the items I was mailing took up far greater volume in the box than the items sent in my delight.com order. The biggest items were the Clauses. Still, I re-used what of the ghost poo pellets would fit.


You can briefly see the holly leaf and berries that decorate her bun when her hat is off. I didn't realize part of the green from that was visible beneath her hat until after I'd taken the photos, uploaded them to my computer, packed the box and driven 40 minutes each way to ship it and returned home, and then browsed them in preparation for putting the photos here. oh well!

Besides the handcrafted items, I included a Hallmark ornament- a puppy whose coloring resembles Chloe's, a kit for making a pawprint keepsake item, and doggie cookies for Chloe.

Eeek! Can't believe it's taken me this long to link to the pattern for Mr. and Mrs. Claus - what a goof!

Santa Baby

Finally Santa is finished and all his pieces are assembled. But first a recap:


This is the way I got his hair to fit. 


Here he is in pieces:


And waiting to get all the ends woven in, snugged tight and snipped:


Here comes Santa Claus, finished and with Mrs. Claus - up next!

Monday, December 20, 2010

Hurray for miracles!

For reasons I can't identify my sister's old camera suddenly loves me. No more oddness, all is predictable and easy. Yippeeee!!


Now, just imagine you're listening to "Isn't she lovely?" (or be a sport and hum it) and ignore the stray threads that need to be secured and clipped. If she continues to behave herself and cooperate I won't display the photos of her modeling the long underwear and clunky black boots that are under her gown.


Mrs. Claus certainly has turned out well so far.

Saturday, December 18, 2010

Better photos of zippered bags

Forgot I'd taken these. Been distracted a bit lately.


It recently came to my attention that even the smaller bag, which I thought I'd made according to the pattern proportions and stitch count, is actually over-sized on it's own. Pffft - sometimes these things happen.


I'm totally loving that my sister's old camera enabled me to make a video clip of the unacceptable zipper noise and performance. It's so great when I can offer proof that it's not just me!

Tuesday, December 14, 2010

Holding hands

But not feeding ducks (ha ha!)

Actually I'm making the Mr. and Mrs. Claus hands and really enjoying it. They're surprisingly simple to make and one of the details that drew me to the pattern. I haven't managed yet to take a photo that captures the image I'd like, but the ones that came out in focus I'll share.


I ran out of yarn, using up all of the Bernat Satin Sport in Wine. I went out looking for it, knowing that when I bought it at Michael's it was the only skein they had. I was looking for sport or dk weight and still this was the only choice in the red range. It's been a nice choice, except that initially the skein had kind of a worn and manhandled look to it. If there had been any other available I would have bought that instead.
So I went to JoAnn's first, thinking that specifically the satin sport had been advertised in a recent flyer. Don't know for sure if it was or not, but all I could find was Bernat Satin in worsted. (I may never forgive them for rearranging the store in July!) Bordeaux appeared to be the exact same color was Satin sport Wine.

I went back to Michael's, where they scanned my yarn wrap and told me they should have had 1, then the clerk corrected herself and said 21. She called someone to help me look and I was a bit surprised where she looked for the overstock before declaring that they must have sold all of them today. I still think that sounds a bit far-fetched. Although it is a nice seasonal color. She went on to tell me that they get shipments on Tuesday and it might take a few days to get all the stock on the shelves, check back.

I figured I'd switch to the new yarn for pieces not yet crocheted. I even did an experiment with removing a single ply from the worsted yarn and crocheting the second of two identical parts in the modified yarn. The first had been done in unaltered worsted. I wanted to see whether it made a size difference (using the same hook for both). Removing a ply did seem to make the altered yarn about the same thickness as sport and I got the same wpi from it as well. Comparing the two finished items side by side (no photo to share yet as they all came out blurry) the size seemed the same. The difference was thickness - thicker yarn, thicker piece. It also made it feel a lot less pliable.

I think the full thickness of the worsted yarn is wholly appropriate to use in Mrs. Claus's dress. When I began the red portion of the dress in sport weight it seemed a bit airy to me. Actually that's the folded up bottom portion of the dress directly behind the hand on the right shown above. It's at about row 15 or so of 23. Oh - I did get a photo of that separately. I am enjoying the way the characters and their clothing are assembled. I suppose that may sound like a strange thing to say. Perhaps the construction is very standard for crocheting doll like figures. I can't recall whether I've ever crocheted similarly shaped and divided up items before. I guess there may be similarities to the knit Jack Frost I have yet to complete. He's on hold until I finish the things that need to ship out and arrive in time for Christmas.

I'm starting to get concerned that I may run out of the yarn in worsted weight as well. I understand what someone else told me yesterday that her patterns don't give yardage - well international wouldn't be yardage - meters that is, because she can't know what hook you used and what weight yarn. I still think it's kind of troubling to expect someone to guess. If it's going to take more than a skein or more than two skeins of yarn perhaps that really is something that should be known up front. Of course how is the designer to know what skeins I'm using, the meters are all different. I say do what everyone else does and write the pattern with amounts and names of yarn used and hooks or needles used. At least that gives everyone else a basis for comparison that you don't have when the pattern simply tells you to get the colors: red, white, fluffy white, black, dark gray, etc. I guess I should have been able to tell that so very much red would be required, but my skills just aren't there yet.

Super Sis to the rescue!

I had a problem with my digital camera. The usb connection on it became dislodged and disappeared into the camera body. So I had no way to get photos out of the camera. But at least I could still take them.

My sister sent me an old card reader she had that would accommodate the obsolete SmartMedia cards that my camera uses. She also boxed up her old digital camera and sent that to me with all the cords, extra cards and batteries, manuals, a remote, etc.  Clearly this camera is more advanced and complicated than the one I was used to. Actually I'm having trouble getting pics in focus using the auto setting and haven't yet figured out why. But then it took me a day or two of thinking to figure out how to turn off the auto flash. Again, the manual is in the original box with everything she sent. I don't really feel like I have the time and energy to devote to much experimenting and figuring and just reading and remembering. (I know that sounds awful.) I always hate to have to replace devices like this because it's a chore to have to learn something new and an adjustment period while I'm not able to really control the operation well.

Well, there have been a few extra developments, including my camera's sudden refusal to motor on. I tried swapping my batteries with a spare set that I always have charged and that didn't make a difference. I'm waiting now for them to go through a charging cycle and hoping that I somehow had two sets of dead batteries at once without realizing it.

In a fabulous surprise, I have discovered how to use my sister's old camera to make movie clips. That sure does a much better job of demonstrating my dissatisfaction with the green zipper. Bravo!

Thanks, Sis!

Caveat Zipper

Zip and unZip your zipper before knitting it into the bag, 
even if it's a new zipper! Perhaps you want to open the package in the store and check it before you bring it home...

The zipper in my larger little felted purse is a big disappointment and a chore to operate. While the zipper in the smaller bag glides back and forth easily with a high pitched zzeeeeppppp!, the zipper in the larger bag is sluggish and loud and difficult. I don't understand why. It's a brand new zipper that I bought at the in a group of maybe 7 new zippers, to match some non-felting yarn I had on hand in anticipation of making several zippered bags. New Coats and Clark nylon coil zippers. It has no business sounding like a belligerent, big metal-toothed zipper, sticking and rusted on a neglected sleeping bag or large utility object.


I didn't notice the difficulty with the dark green zipper until I had knit it in and was nearly half finished with the bag. At that point I thought I'd just have to pick up some wax or other such zipper fixing aid and deal with it later. When I checked at JoAnn's the only thing they could offer was beeswax in a plastic case with slits on both ends. I pointed out that it was labeled with instructions for waxing thread. But the sales associate insisted the slits were also fine for sliding zipper teeth through.

I tried applying the wax to the teeth of the zipper multiple times and working the zipper back and forth. It's never stuck, it just takes an astonishing amount of effort and makes a larger than expected amount of noise. I've come to the conclusion that perhaps the slider is the culprit rather than the teeth. Haven't had the time to really mess with it much since.

You can see the beeswax is kind of caked in there now. Not an attractive solution!
It made the zipper zip slightly less loudly and slightly more smoothly, but when I tried it again a day later it had returned to the original state. *sigh*


ETA: I've just checked the remainder of the zippers and found two or so that are going back for ones that are less loud and more smooth!


Thursday, December 9, 2010

Felted No Sew Zipper Bags

Following the 3rd installment of TECHKnitter's A little felted purse KAL (part 1, part 2) I attempted to hand felt the bags. Now I can't figure out if that was yesterday or the day before - it was the day before, or rather the night before. They were drying all day today (well technically it's been tomorrow for almost 2 hours already, but since I haven't slept it's still "today.")

I've never been keen on rubber dishwashing gloves, but the ones I could borrow were about a size too big. I don't know if this added any potential extra friction, I did notice it especially annoyed me around my thumb. Or maybe it's just the shape of the gloves. They fit better with your thumb bent across the palm, as if grasping a plate. Since I was using them with flat hands that made them feel gappy and weird.  Oh, well!

I think in places I overfelted and other places underfelted. I tried to draw as much extra water out of the bags by rolling them in towels. I'd left the bags on their side for several hours earlier today under a ceiling fan so the bottoms could get dry more quickly. There is still dampness under the little pockets that were made by folding and tacking the bottom.


Isn't the little bag cute?

It's about 4" wide at the base and about 5" wide in the middle and at the top trim.  This bag is 3.5" high and 2.75" deep across short direction of the base.


Bottoms up! I wasn't sure just how the shaping on the bottom was supposed to go, but this seemed reasonable to me. I probably should have felted the bottom a little more so the seam would disappear.


This is the big one, of course. At first I'd stuffed it with plastic bags and left the sides straight. Early this morning I decided one of the really appealing things about the bag pattern model was the rounded sides. So I stuffed in a few more bags and readjusted everything. Too bad my hands are concealing that detail. I would have liked for it to have the same curve as the small bag. But this is my compromise for now.


At least the shape is easier to see in this photo. Perhaps the pattern in cognac heather and plum heather, too (the upper stranded pattern). I used the chart from Latvian Fingerless Mitts by Veronik Avery in Knitting Classic Style: 35 Modern Designs Inspired by Fashion's Archives. Except I started the top intarsia band at the bottom of its portion which makes it upside down since the bag was knit from the top down. The lower, more eye-catching band is the same right side up and upside down.


I really feel like if I'd been planning rather than making it up as I went along I would have positioned the dramatic colored band higher, or near the top. And I probably would have chosen less similar colors for the subdued pattern band to make it stand out more. I don't know why I still have such a weakness for pairing cognac heather with plum heather. The order makes more sense if I'd worked all of the body of the bag in reverse, starting with the jade that's on the bottom and ending with cognac heather, the solid band near the top. Just noticed how terribly difficult it is to see the top trim. I think the color is called dark teal heather. It's a nice dark green. Bag measures 5.5" across the long side of the base, 4.75" in the shorter direction and 6" across where it zips closed. Width is about 6.5" and it's about 6" high including the top edge of the green trim.


Sure looks like it's just about to roll off and never be found!


This was supposed to be attached to a zipper pull for the smaller bag, but some time after taking the second pic it must have fallen out of my hand and I haven't found it yet.


Tuesday, December 7, 2010

Seasonal Clauses

That would be Santa Claus and Mrs. Claus, of course.

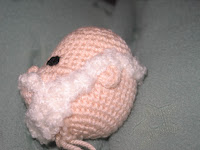
I appreciate that the pattern gives her dimensional bangs. The first time I made her hair it was a bright white. The when I got to Santa's hair and beard, it called for furry yarn. What I could easily put my hands on was slightly off white. I didn't think about that making a difference until I had them side by side the next day and her hair made his look dingy. Actually, the pattern calls for making her hair gray. At first I couldn't find my dk grays. And then even after I did I just wasn't so keen on giving her gray hair. So I looked through the dk yarn again and found this off white color that didn't clash so badly with Santa's hair.

I did have a hard time figuring out how to apply Santa's hair and just how his mustache was to be completed, but managed something.

I think what is shown here is partly due to shifted position or the angle of the camera. I have her hair pinned on with a single U shaped blocking pin in the front. When I first made her hair in blinding white the back of the hair seemed impossibly short. Here you can see it sort of tapers down to about ear lobe level, which is realistic. In the original hair I added several extra rows to make her hair extend down as far as i thought it should be. In the second hair (pictured) it may just need a slight adjustment in positioning. I've left the yarn uncut, though, because I haven't completely made up my mind about whether or not the hair is finished.
I


Here's Mrs. Claus's hat, which seemed awfully slow to work, but it was easy and very clever for generating all those ruffles.

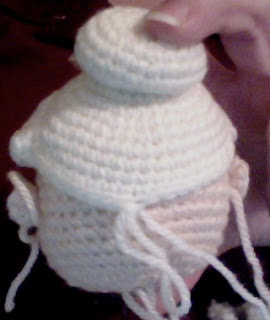
Together again. I realized typing just a bit ago that I didn't have any snapshots of Santa's hat yet. It's only partly completed, but starts from the round white ball at the bottom tip. This pattern is easy to follow with the increases and decreases and it clearly pays very special attention to construction and shaping. For instance, the ball which anyone else would have made a pompom - it's crocheted!


When I finish up the clothes for this pair it's going to be no more crochet with boucle for me!

Monday, December 6, 2010

No sew zipper bags

Following along with TECHKnitter's A little felted purse KAL (part 1, part 2), earlier today I was delighted to find the the final installment posted.  It covers flattening the bottom of the bag, felting by hand and making a zipper pull.  In the meantime, I'd started a second bag. I improvised upsizing the bag for version 2 because I realized I'd rather be able to put my whole hand inside. From there I just kept making it up as I went along.

There were some big blunders, and a few decisions that could have been better, but it's been a lot of fun. I started off using the wrong dark green zipper and didn't realize that until I was 3/4 done with binding off the top trim. That zipper was an even less ideal match than the one used here..

Because of my camera situation I am reduced to whatever pictures I can manage to take with the computer.

Actually, the color in these is pretty good. It'd be nice to have less hands and a more interesting background, though.


I'm still working on knitting the bottom of the second, larger bag and haven't yet felted the first bag. I just wanted to stop here and put some time in on a project that is a gift for someone else. I had a thought that these could make cute gifts, but I'd have to put some planning into the colors and possible designs. So far my commitment to the project has just been to buy zippers that match yarn I'm willing to use for the trim at the top and planned to use up some of my supply of wool on hand. Which mostly means only colors that I'd pick and not colors that really appeal to or reflect family and friends. It could be especially nice to make sets of nested bags, but then there's additional thinking and figuring and also multiplying the work by about three times.

The project I stopped for would be Santa Claus and the Mrs. I have to take long breaks from it because I'm using a small hook and working tightly, which really tends to wear on my hands. Oh, my! I just realized that I didn't take and pics yet of Santa's hat. It's not quite finished, but there's enough of it to be worth a glimpse anyway.

I'm thinking perhaps it was a bad idea to work a stranded pattern in something I'm going to felt lightly. Of course, strands on the inside are going to be great for snagging so that sort of demands a lining now. oh well! Besides that, I could have done a better job of arranging where I was putting the designs on the bag. It just didn't occur to me to put a stranded color pattern on the bag until I got to the teal striped (working downward from the top). The two colors in the hard to see pattern are ones that I love together, but they are not very distinct in such a small pattern. Actually, the color work is the chart from Latvian Fingerless Mitts by Veronik Avery in Knitting Classic Style: 35 Modern Designs Inspired by Fashion's Archives


The smaller, original bag has a bottom and only needs felting and the zipper pull. I realized after completing the knitting and starting the body of the 2nd bag that I'd misunderstood the instructions. Instead of having 19 rows total, including the stripe, I had 19 rows after the stripe. I'll always find a way to do something wrong.

If only I knew...

If I knew my camera was going to die I would have uploaded my pictures earlier. I'm really not sure completely what happened, but I connected the USB cable to the computer and the computer couldn't see the camera. Well, I first noticed the photo program didn't see the camera, then I noticed the computer didn't. I went to the help menu and followed the suggestion to check that the cable was plugged in properly. All along I'd been ignoring a red flashing battery symbol in the upper left corner. Felt a bit puzzled about that because I had just swapped the batteries a few hours earlier and recharged the dead set. Just took a few pictures, so the batteries should not have been dead.

Back to the cables. I plugged one end into a different USB port on the computer and nothing else happened. Finally I looked at the tiny end of the cable connected to my camera. It seemed to be leaning downward, as if only partly connected. I pushed it in securely and it didn't feel right. I removed the end and saw that the port for that was half misaligned with the opening on the camera. When I tried to attach the cable again, hoping to kind of snag and pull it back in place it totally disappeared into the camera. Seems like I should hear something rolling around in there, but there isn't. Weird. At some point in turning off and on and switching to the view mode the battery symbol went back to all green and charged. Again, no idea why. Probably was before the USB connection broke off and vanished.

So, can't show any pics of the bigger little felted purse that I mostly bungled. Actually I took about 3 pics of that just before frogging it. Had goofed it in several ways: picked up too many sts, increased kfb too many times, and most prominently didn't use the matching zipper I bought to go with the yarn. I thought I'd only bought one dark green zipper to use with either of 2 dark green yarns, but actually had found two zippers, one that favored each yarn. When started the project I didn't realize I was using the less matchy zipper. But as I worked most of the top and nearly finished binding off it just seemed to stand out more and more.

What I had just taken a few snapshots of was version 2 of the bigger little felted purse. Both zippers are about 6.5" total and 5.5" zipper opening. I really like the size and proportions of the bag as the pattern is written, but I suddenly thought I'd like to make the next one wide enough to actually stick my whole hand in. I plan to just scale up all the dimensions. So on v2, the zipper is knit in and the top is completed and bound off. I'm picking up stitches around the bottom to work the body of the bag. For this one I thought ahead and measured out about 120" of yarn before I began attaching the zipper. I tied it up in a butterfly and then when I got to the picking up part around the sts knit through the zipper I folded the excess beginning length in half and then started using that with the crochet hook to pick up those stitches. It was near the end of the failed bigger version that I realized I'd avoid adding tails to weave in if I left a long enough tail at the beginning.

Earlier in the year we got rid of the printer that had been unreliable. It had memory card slots, including one for my dinosaur memory card. The new printer has slots, but not one as ancient as I need. There's probably 8 photos or less on the computer. I suppose the bigger disappointment is that I didn't take the opportunity to get a picture of Mrs. Claus with her hat. Mr.'s isn't finished yet, but hers is and it looks great. Oh well.

I really really dread having to figure out what camera features to look for in a replacement.  Too much stress! Maybe Walgreens can move my photos from the card to CD until I work through a better solution.

Friday, December 3, 2010

An Idea, unexpected inspiration

Yesterday I was at Walgreens for just a sec and I saw a young woman wearing a scarf wrapped once around her neck with the long side extending down one leg about to her knee. I live in central Florida; it was still fifty some degrees outside at the time. It was the second day of dramatically colder overnight temperatures, though. I don't usually see such elaborate scarves being worn here in any weather, really. Hers appeared to have a pattern with small squares with little stripes that mimicked a basket weave.

Driving home I had a thought that the Diagonal Box stitch pattern by SmoothFox could make a really interesting scarf. (Technically the pattern is written to make just one quarter of the square to the left, as if starting from any of the corners. I was just determined to make a 12" square in one piece and arrange the diagonal stripes just so.)

I think if making something long like a scarf I'd start off like a small square, maybe just 6", and instead of reducing the number of squares in a row to make a square overall it seems like you could just keep going back and forth along the diagonal with the same maximum number of blocks just as long as you like. I suppose it would actually be reducing by a square on one side and adding one on the other, but still keeping the same number of blocks each time until you get to where the end should be.

The downside to a scarf would/could be that it makes a slightly, but noticeably stiff sort of fabric.  But I have a feeling in softer yarn it would be a little different than in kitchen cotton. Perhaps the number of color changes and loose ends would be an issue. I really did enjoy making this. Will have to do it again sometime!

More progress - No sew zipper KAL bag

This is my progress so far on A little felted purse KAL.

Past my bedtime, but I'm kind of excited about the pictures, so I'll share those at least.

 Working the 3 needle bind off, but using one hand to hold the camera ;o). Turned half inside out, this is the best color representation of them all.

You can see my KoalaCaddie there too. Been meaning for a long time to do a lot of typing about how wonderful it is and how much I love it. Isn't it pretty?!

ETA: just realized I goofed following instructions. Think I was supposed to only have 15 rows after the color change for a total of 19. I worked 19 in the bottom color, though. oh well!
3 Needle bind off done.

Right side up
Up side down
See why I need to adjust the
tension in the superwash
pick up row?


Thanks, TECHKnitter!